
It used to be perceived that a powerful PC is a noisy PC, which is true considering the weather conditions in Malaysia (imagine late spring all year round). This should be worse in an overclocked system where people strap huge chunks of metal with multiple fans roaring to dispel the heat. Well, the folks at be quiet! have a different idea.
Shipping us their Dark Rock Pro 3 CPU Cooler to prove a point, this 250W TDP rated air cooler is one of their high-end-German-engineered products that emphasizes on silence (hence the name be quiet!) without sacrificing performance.
Huge thanks to be quiet! for providing the sample that made this review possible, the Dark Rock Pro 3 is available for $89.99 USD (approximately RM287) from newegg, NCIX and Amazon. With that said, lets jump right into the unboxing!
Product Specs

Packaging

The be quiet! Dark Rock Pro 3 is packed inside a handsome black cardboard box. An illustration of the actual heatsink and fan is right in the middle with the name and tagline “No compromise silence and performance” right below along with the rated TDP and some key features of the cooler in English and German. Branding is on the top right and a small highlight of be quiet!‘s own Silent Wings fans (thats included inside) at the top left.

At the back of the box you’ll find schematic-like drawings of the cooler with highlights of the physical features of the heatsink and fans. The full spec sheet is also present here.

Opening the top cover, we see the use of soft foam to safeguard the cooler during shipment with a small circular cut-out highlighting the brand, ingenious!
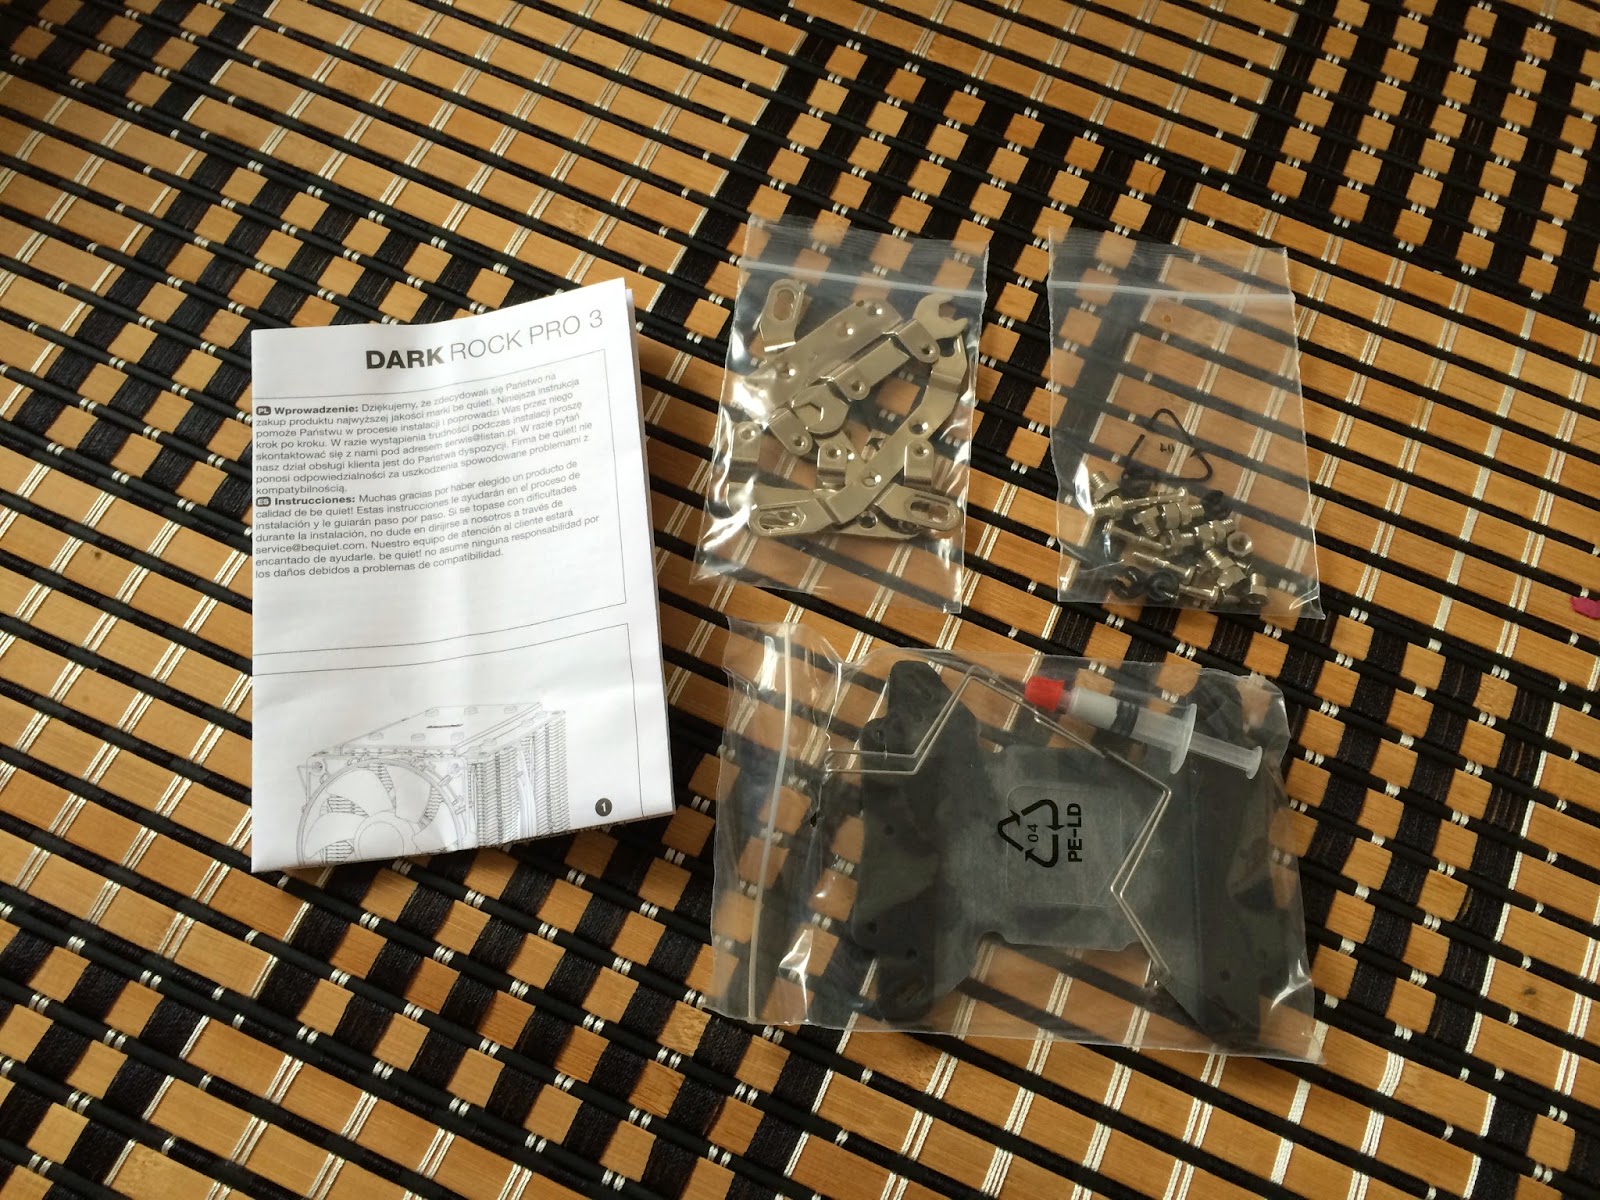
Accessories include a user manual, a backplate, an extra fan clips, thermal paste, mounting brackets and screws for all Intel and AMD sockets.

The Dark Rock Pro 3 is a dual tower heatsink, the fins on both towers are crimped in the middle to hold them together securely. Both fans are already pre-installed to the heatsink so you could actually mount the heatsink right after placing the corresponding bracket.

Frontal view of the mounted 120mm Silent Wings fan.

The top of the Dark Rock Pro 3 is covered by an anodized black aluminium plate that not only looks great, but also helps to somewhat channel the air to the fins. note that the heat-pipes termination points are capped which added to the aesthetics of the Dark Rock Pro 3.
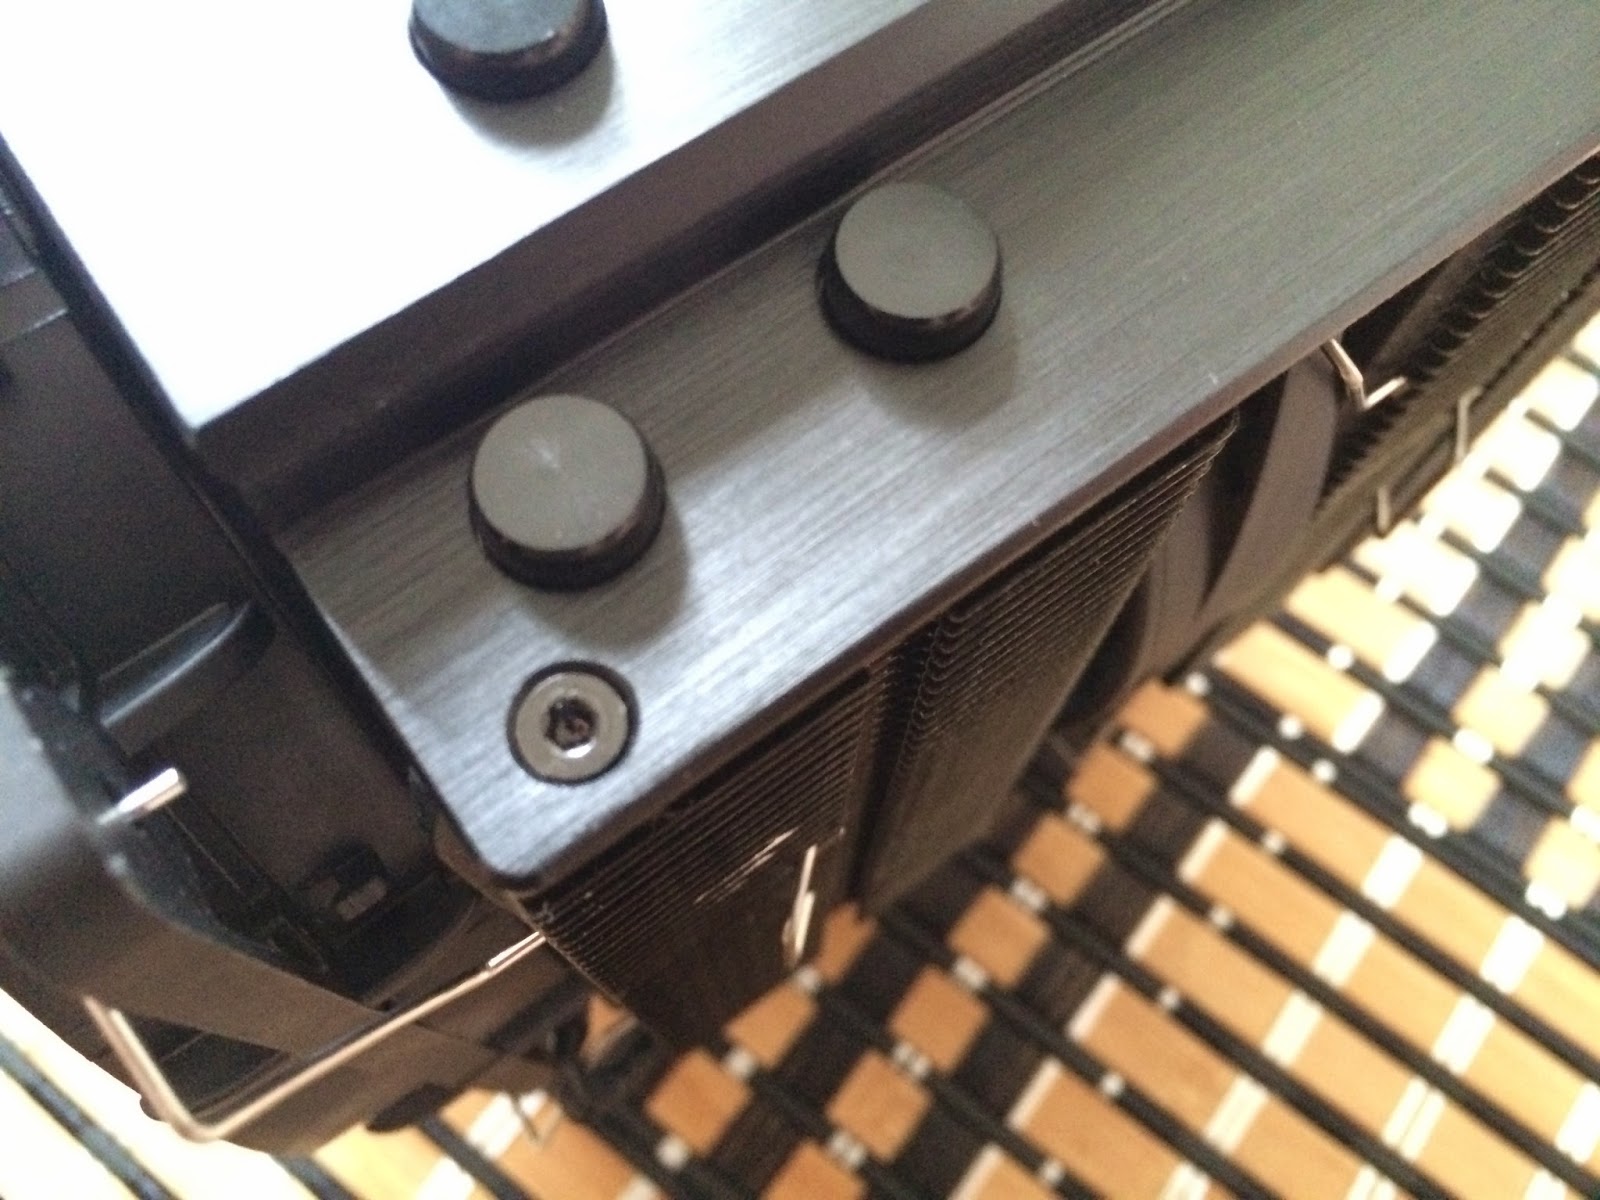
The top plate is secured by four Allen-screws on each corner.

Once taken off, you will have access to the middle 140mm fan which is replaceable with any fan of your choice.

Shifting our attention to the fans, be quiet! provided a 120mm and a 140mm from their Silent Wings series.

Both fans are PWM controlled and may be linked together in case you only have a single 4-pin PWM header on your motherboard.

We really like to see braided cables and be quiet! will not hear a pep of complains from us in that department.

To top it all off, there are rubber strips running along the sides of the fan mounts to dampen any vibrations that may be generated. from the mounted fans.

The CPU contact base is mirror-polished-nickel-plated-copper with seven-6 mm heat pipes protruding from the sides.
Installation and Testing

be quiet! might have to reconsider on the mounting method and design as the installation is a bit tricky even to us. To mount the heat-sink onto our Asus Maximus VI Gene motherboard, we must first place the backplate and thread the screws through.

No need to hold the backplate al the time, just secure them screws with the small plastic clips provided.

Prep the heatsink with the correct brackets secured by 4 screws.

Next, insert the bolt to the bracket and secure them to the corresponding position according to your motherboard’s socket. For socket 1150, it’ll be positioned to the middle.
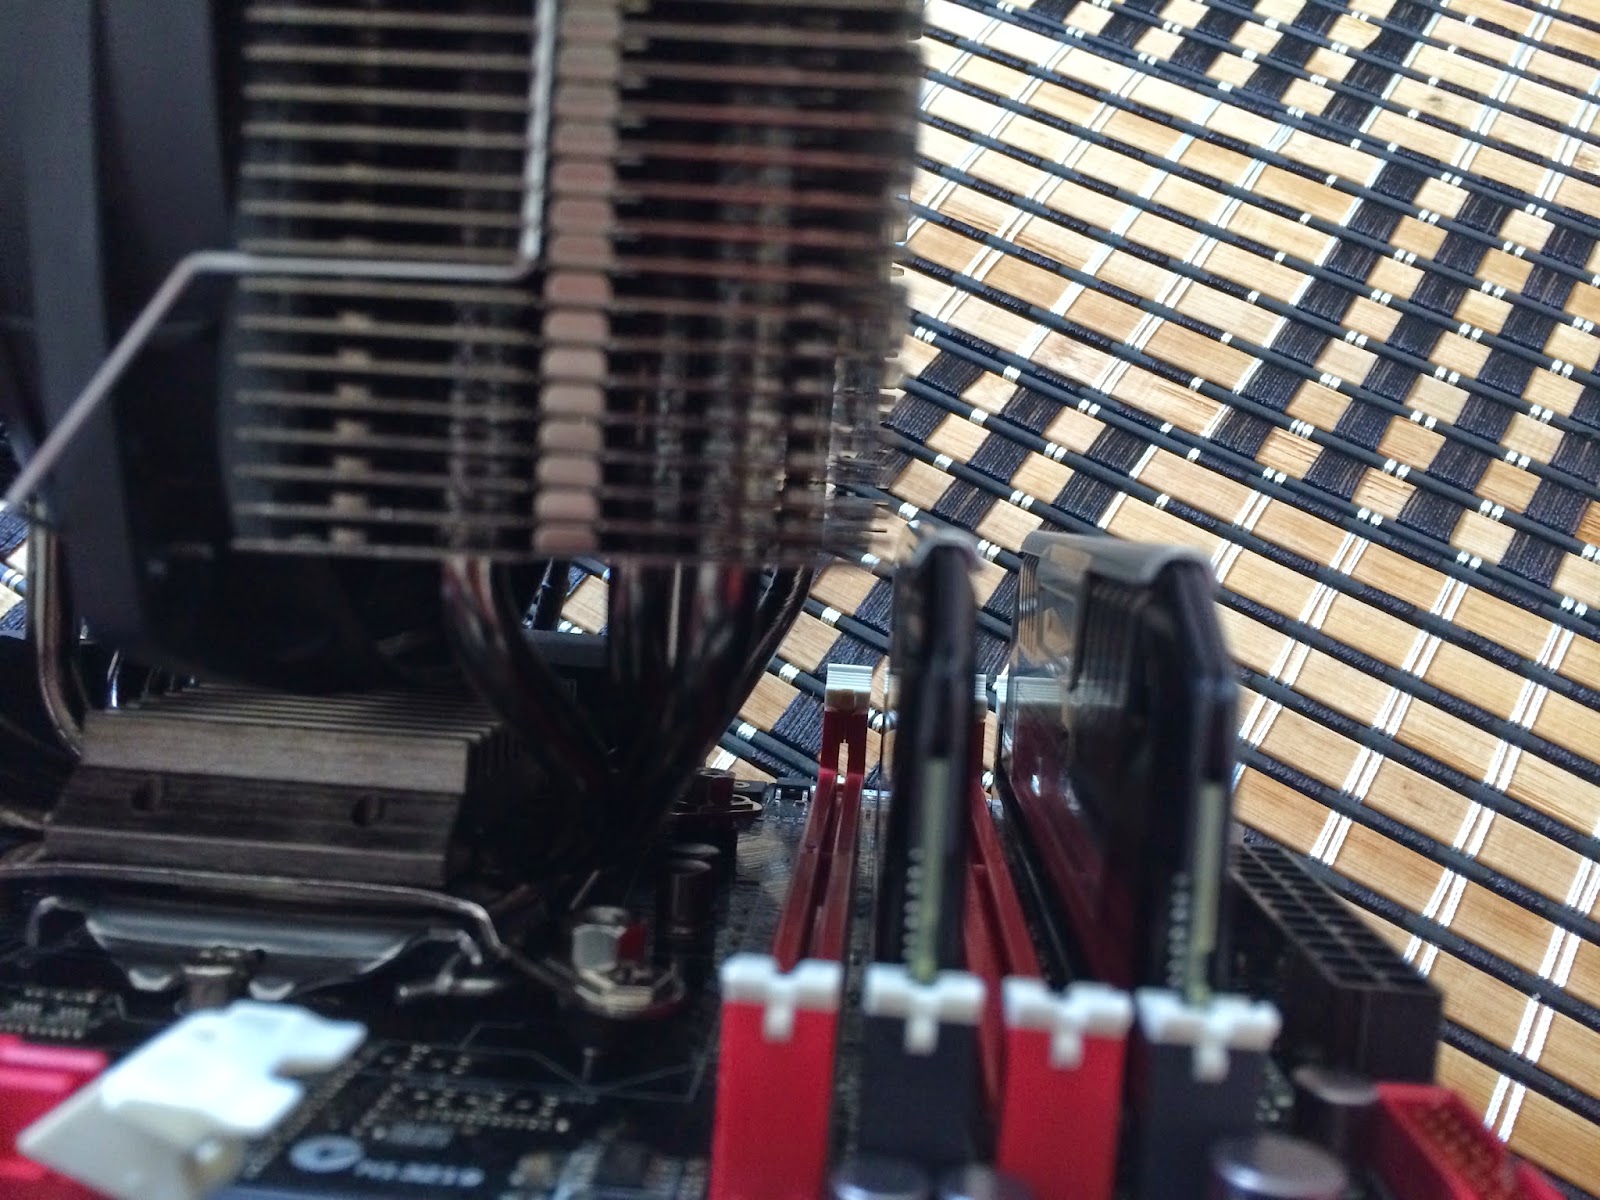
RAM clearance is an issue here but it won’t cause you too much misery if you’re on low profile RAM(s), else mounting a fan at this side is totally impossible for tall RAM(s).

We do reverse air flow configuration for those who are using tall RAM(s), where the air intakes from the rear of your casing and exhausted through the front.
Testing
Test Rig Configuration | |
| CPU Cooler | be quiet! Dark Rock Pro 3 |
| CPU | I7 4770K @ 4.4GHz |
| Motherboard | ASUS ROG Maximus VI Gene |
| Memory | Corsair Vengeance Pro 4GB x 2 |
| Primary Hard Drive | Crucial M500 120GB |
| Power Supply | Silverstone ST60F-P |
| Chassis | N/A |
| Display Monitor | Dell U2312HM |
Firing up a CPU stress test with the system listed as above, we’re using the Prime95 with the option ‘In-place large FFTs’ for maximum heat output, under room temperature of 28ºC. We’ve also included the results for various CPU cooler that we’ve tested with the same configuration as comparison for the be quiet! Dark Rock Pro 3.
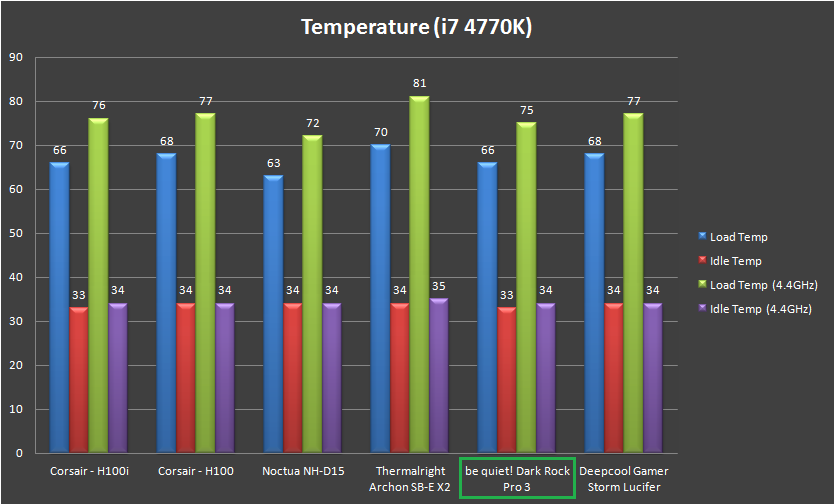
Having almost zero operating noise, the be quiet! Dark Rock Pro 3 is one of the most impressive air cooler we’ve tested to date, which is able to perform as good as Corsair’s H100i liquid cooler and just 3ºC behind the Noctua NH-D15.
Conclusion
RAM clearance issue and tricky installation is really a pain, but be quiet! Dark Rock Pro 3 is still one rock solid performer that one should really look into for it being almost dead silent during operation, performs as good as a Corsair H100i and most importantly, lower price point compared to the Corsair H100i and Noctua NH-D15.
If you own a pair or two of those fancy RAM(s) that often faces RAM clearance issue but has already set an eye on the be quiet! Dark Rock Pro 3, you can still go for the reverse airflow setup that we’ve shown in the installation section.
Pros
- Well secured packaging
- Aesthetically eye pleasing design
- Fans are pre-installed
- Sleeved fan cables
- Extremely silent operation
- Rock solid performer
- Value for money
Cons
- Bulky
- Tricky to install
After a serious consideration, we’ve decided that the be quiet! Dark Rock Pro 3 is hereby awarded with a Silver and Recommend award from us here at www.tech-critter.com.


