The Raven series from Silverstone are some of the best chassis that most PC builders would love to have. Right from RV01 to RV03, the Raven series have sported 90-degree mounting for the motherboard tray that encourages heat dissipation through the top vents; This time however, they’ve opted for an inverted motherboard tray.
Thanks to Silverstone Malaysia and Inter-Asia Technology for the provision of our Silverstone RV04 sample. Retailing at RM589 SRP, lets take a look at how the RV04 stacks up against it’s older siblings.
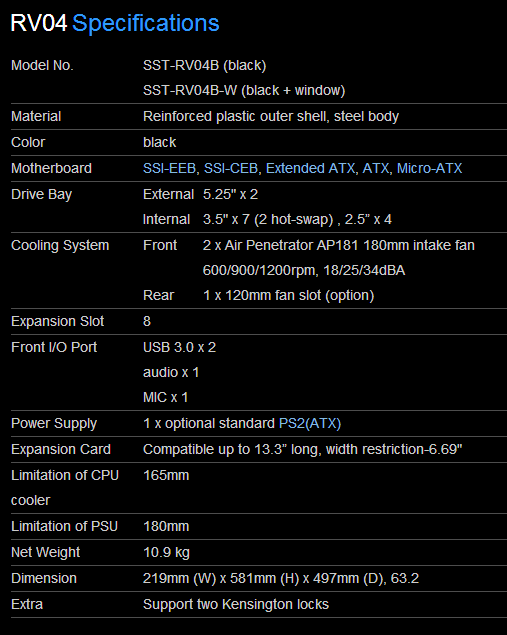
Specifications
Packaging
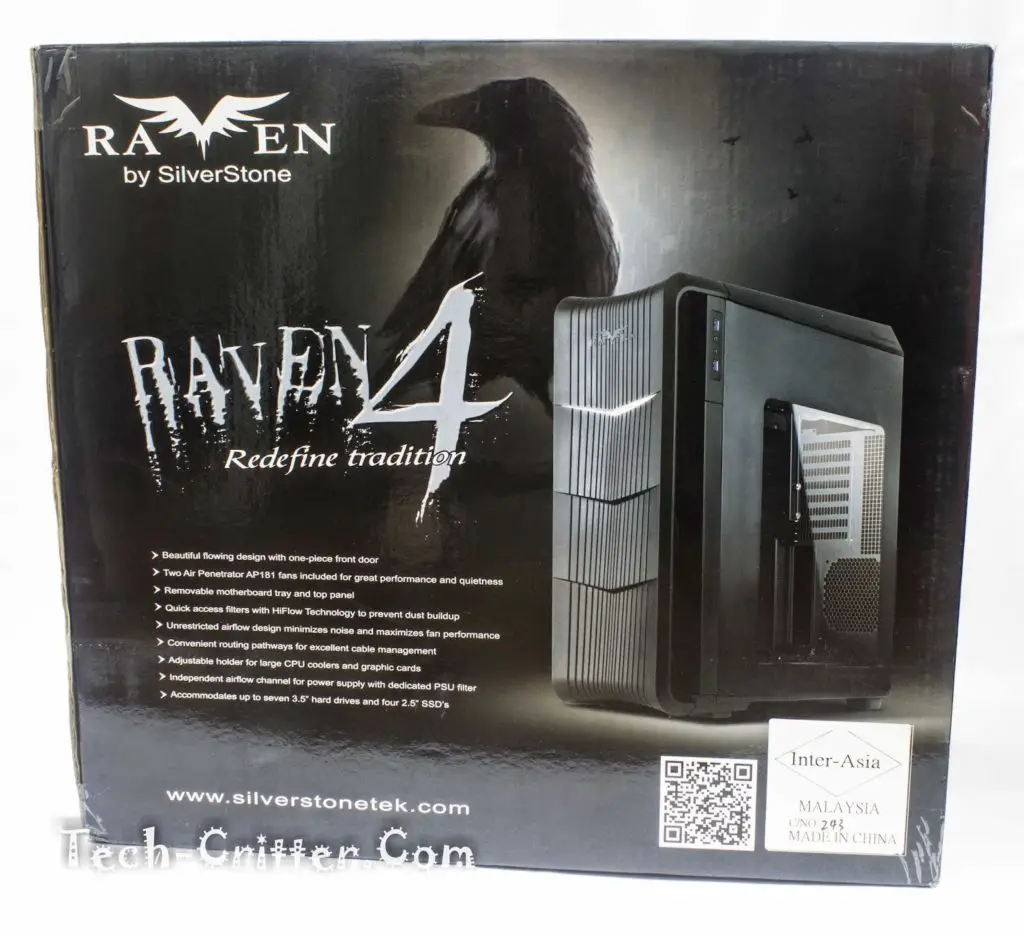
The Raven04 comes in a full coloured cardboard box with a dark theme, which is kind of surprising considering that Silverstone have the RV03 packed in a more cost-friendly brown box that we thought will be Silverstone’s new packaging policy from then on but apparently, we guessed wrong. With that, it’s back to the usual Raven-styled glossy design with the chassis depicted at the front with a raven in the background. Highlights of the chassis features sits just under the name and branding and finally Silverstone’s own website and a QR code that links to the micro-site of the RV04.
Much is the same at the back, except that you get a view of the internals of the RV04 with the features labelled with descriptions beside it. This seems very much like Silverstone’s own Fortress 04 that we reviewed recently doesn’t it? this is because it essentially is the same chassis with a few different set of features. As you read on, you’ll find a lot of comparison to the Fortress 04.
Full specification of the chassis can be found at the right side.
And on the left is a short introduction to the Raven series and also highlights of the features again in multi-lingual formats.
Popping the box open, Silverstone placed a reminder to read the manual. If this is your first time building a system in a Raven 04, I’d recommend that you do so as well.
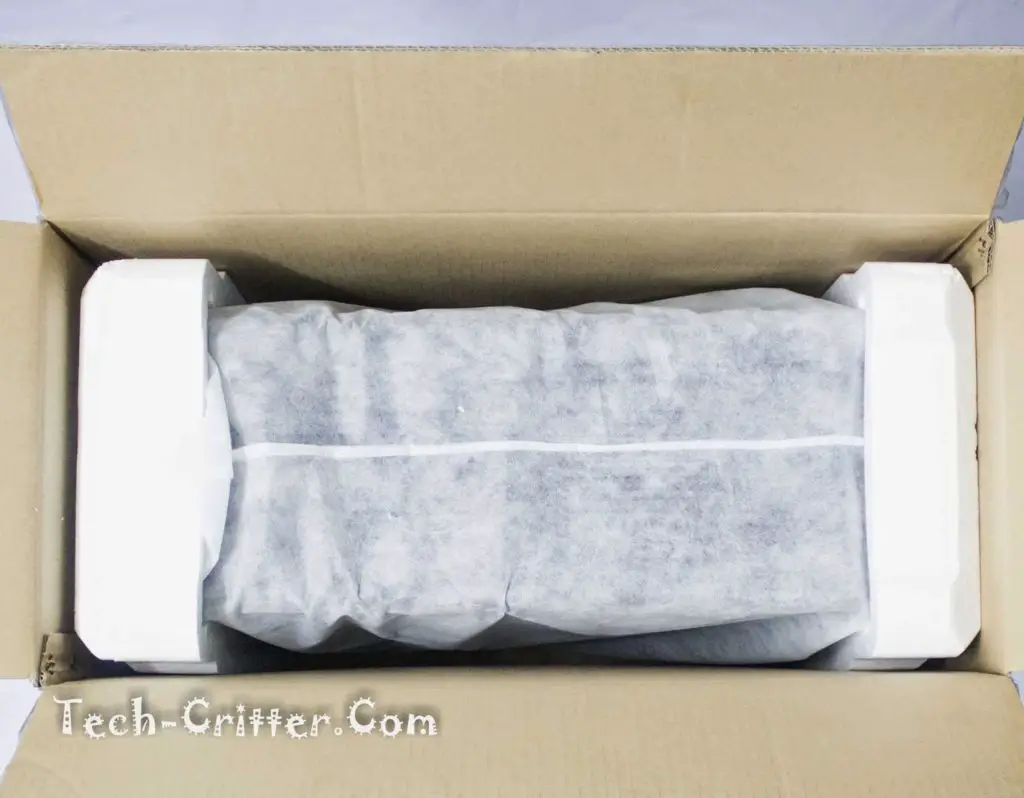
Packaging is moulded hard foam on the ends and the chassis is wrapped with a cloth-like cover to protect it from scratches and dust.
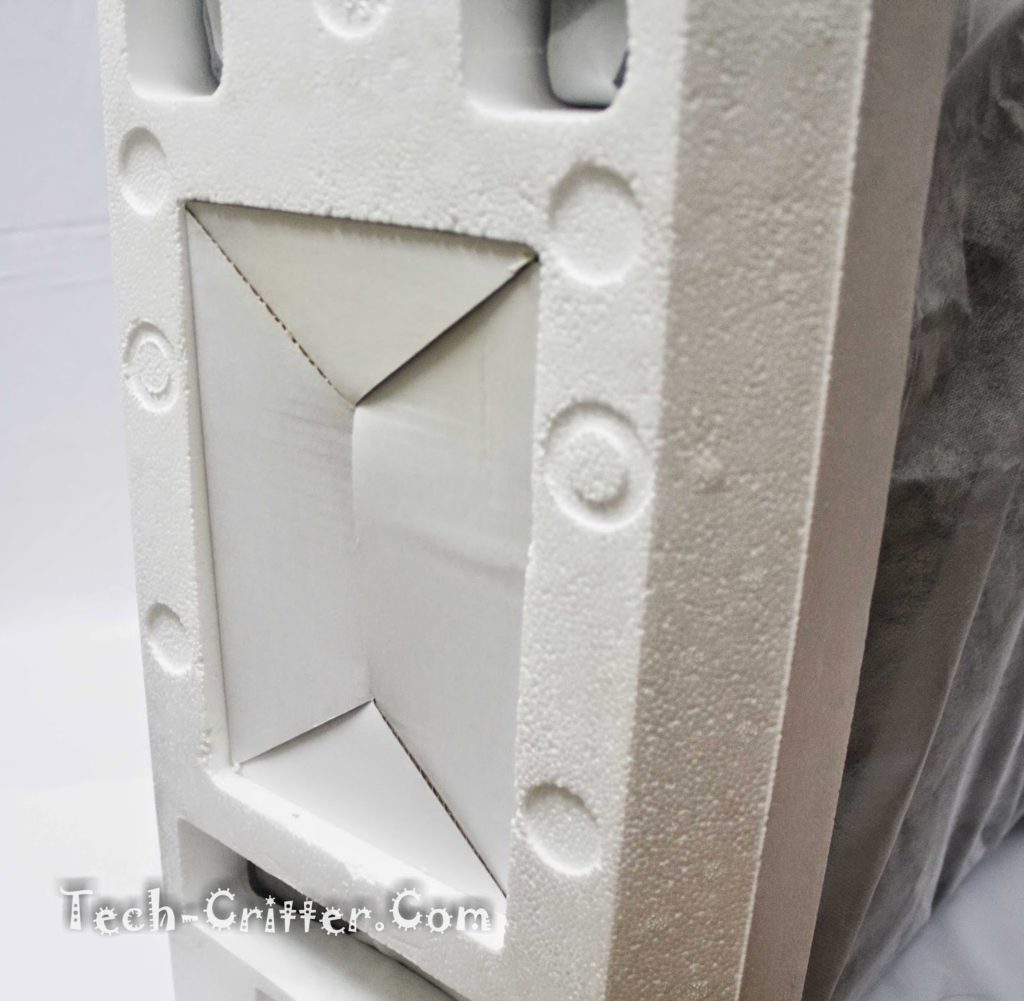
The accessory box is securely lodged in between the middle of the moulded foam, very creative use of space.
This is what you get inside the accessory box; User manual, a bag of screws, some zipties, plastic brackets for up to a 360mm rad mount at the front and a GPU support bracket.
The Chassis
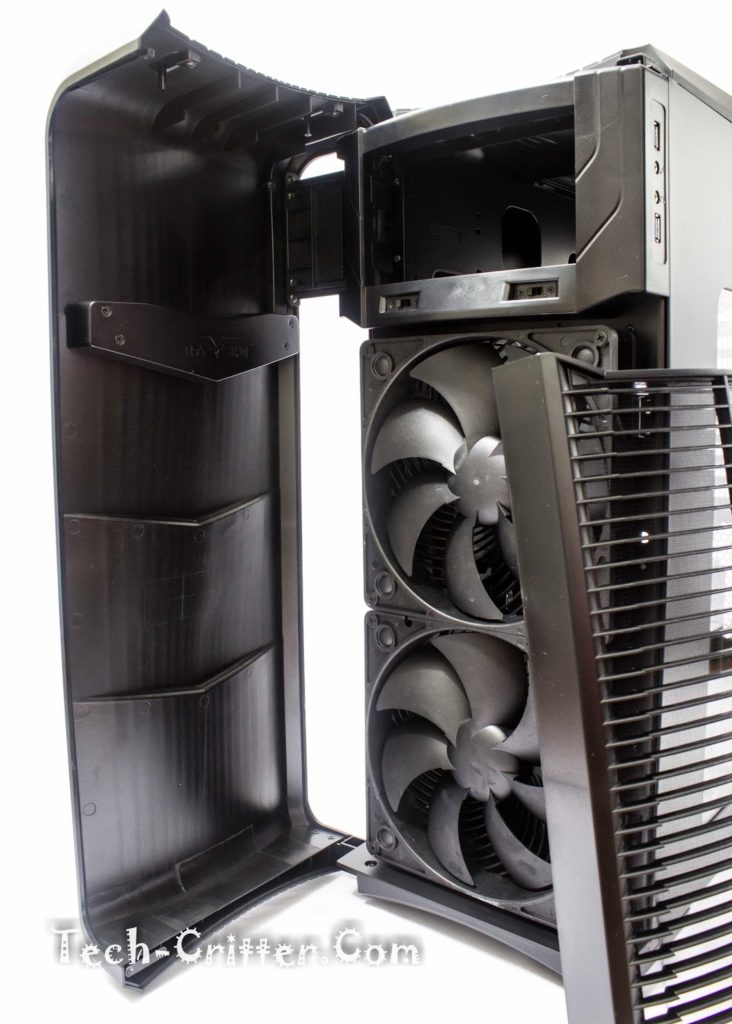
Out of the box, the front cover has a stylized cascading-flowing design that is very much different from the smooth-cleaner cover on the Fortress 04. Gone is the Silverstone snowflake logo and in it’s place, the Raven emblem and the material this time is plastic instead of aluminium. Silverstone embedded the Power and HDD activity LED onto the front cover which will light up when the system is turned on.
Opening up the front cover will reveal the dual external 5.25″ bays, 2x fan controller switch and a filtered grill intake. Compared to the FT04, you do not get the sound dampening materials on the inner side of teh front cover as the RV04 isn’t meant to be a silent chassis to begin with.
The external 5.25″ drive bays covers are easily removable by pinching the sides on the covers. Just below that are two switches that toggles the speed of each of the two intake fans between high, medium and low.
Speaking of intake fans, removing the front grille (which is easily done by tugging at the sides) reveals the dual 180mm Air Penetrators which we know does a great job at the cooling department when we tested the Fortress 04. A 360mm radiator may be placed here but you would have to remove the included AP181 fans and install the brackets to accommodate the new cooling solution.
The front grille might look different from the one fitted on the Fortress 04 but you still get the same and familiar high-air-flow dust filter integrated right behind it.
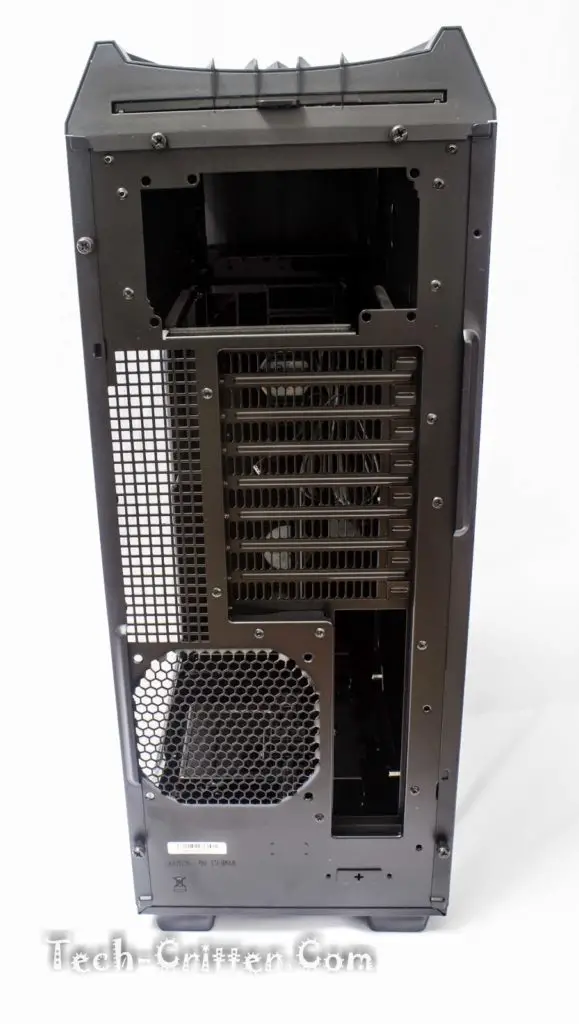
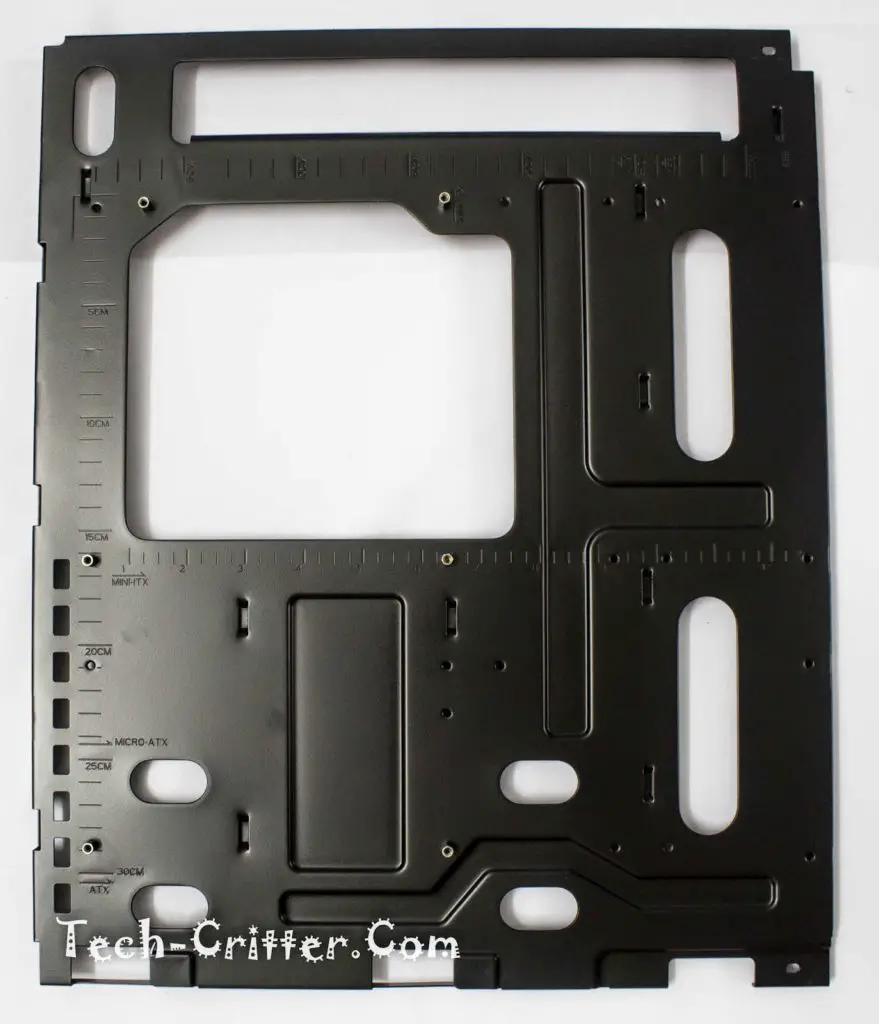
At the back, you’ll find that the motherboard tray is upside-down with top mounted PSU bay, 8 expansion slots, an I/O shield knockout and 120mm exhaust fan mount. This way, the GPU (most likely the hottest component in a gaming PC) will be at the top where the heat will get dissipated much quicker than it will be being at the bottom or a standard layout chassis. Four thumbscrews secures the side panels while another two secures the removable top panel.
Turning the RV04 to the right side, you get a large transparent window to showcase your components. I however, am not too fancy to show the drive cage especially when we have cables sticking out of them. Fortunately, most of the components inside the RV04 is modular in design including the HDD bay.
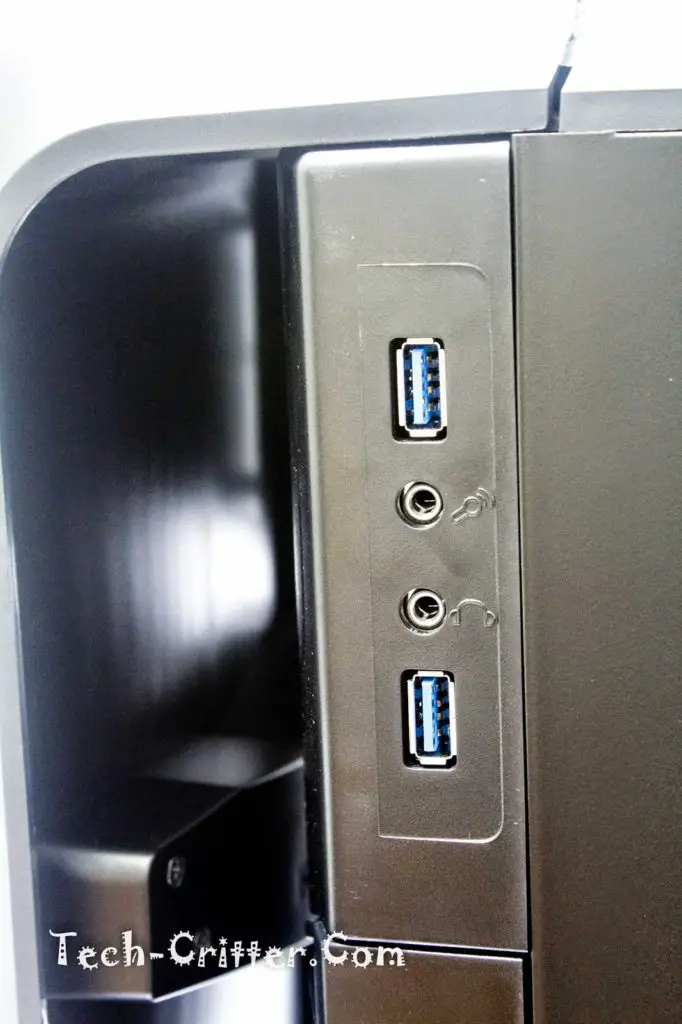
Here is also where you’d find the dual USB3.0 and the microphone and headphone ports
The left side panel is left plain.. and we’re not a fan of the top hinge used on the front door. We honestly think that the design flow is kinda broken with the hinge design. Note that this was where the power and reset switch was on the FT04.
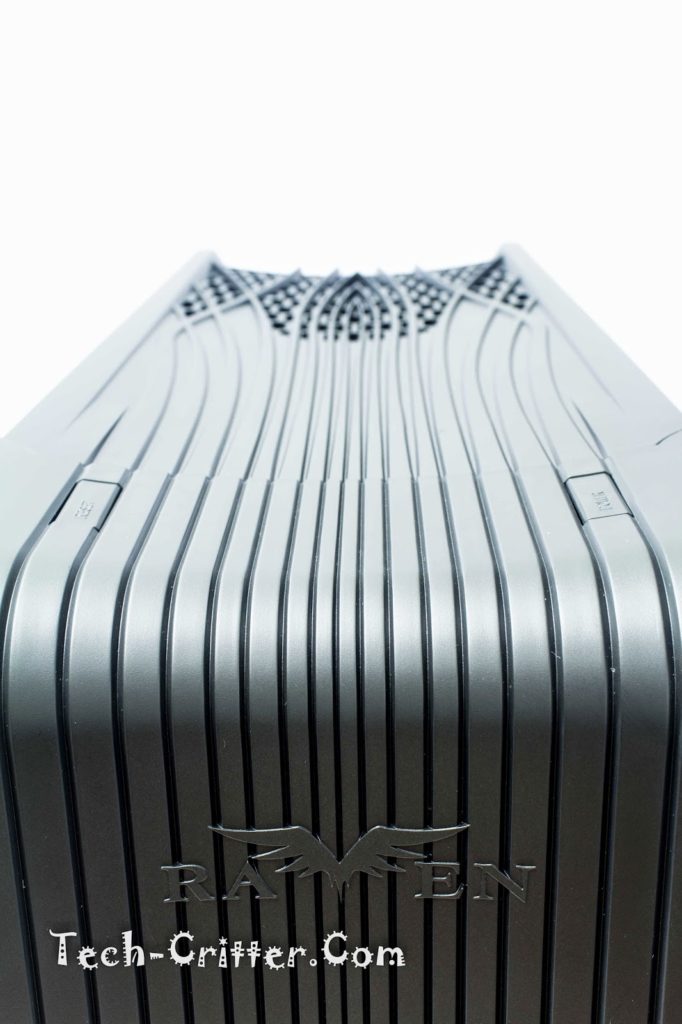
The top panel design flows through the front cover, which looks awesome. The front cover, unlike the one in their Fortress 04 closes evenly this time.
It has a concave design to it as well that adds to the aesthetics but it may trap some amount of dust over time.
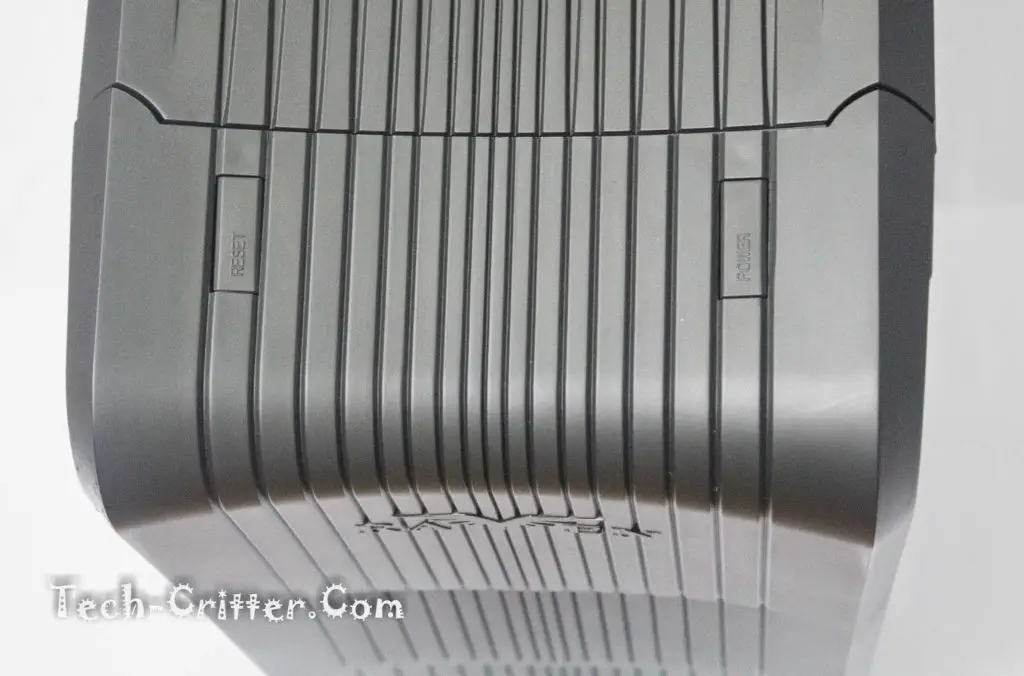
Silverstone have moved the power and reset buttons to the top as well, right on the front door.
Fortunately, even when opened is still accessible. Nicely done by Silverstone.
At the back end of the top panel, you will see the small Silverstone badge on either side…
And a removable dust filter. This way, there is no need to remove the whole top panel just to do some dusting once in a while.
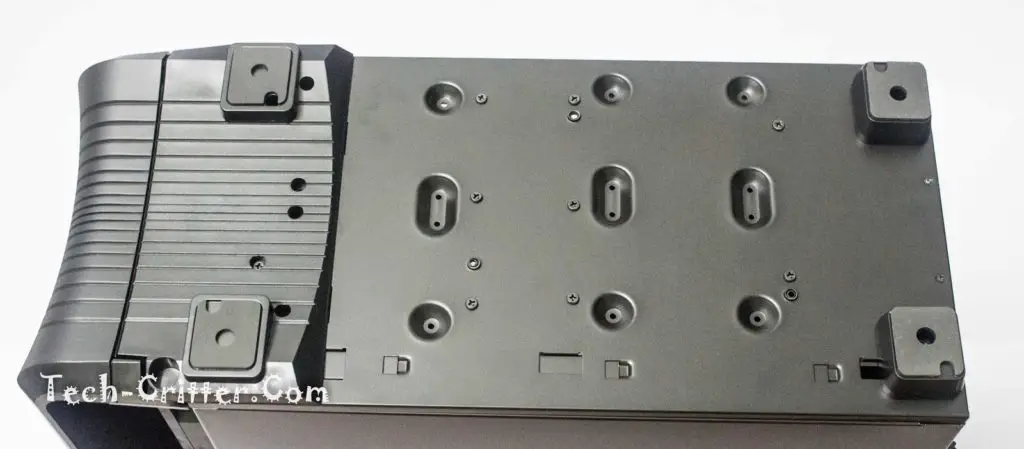
At the bottom are four soft rubber feet which provided some elevation from whatever surface you place it on. Some mounting holes for 2.5″ drives while the other screws are there for removal of the internal parts such as the HDD cage within the chassis.
The sidepanel is much as the same with the one found on the Fortress 04 which is good since the use of screws here is very much welcome for those looking for easy removal of the acrylic window for modding purposes. The difference? noise dampening foam is not present here as well.
Internals
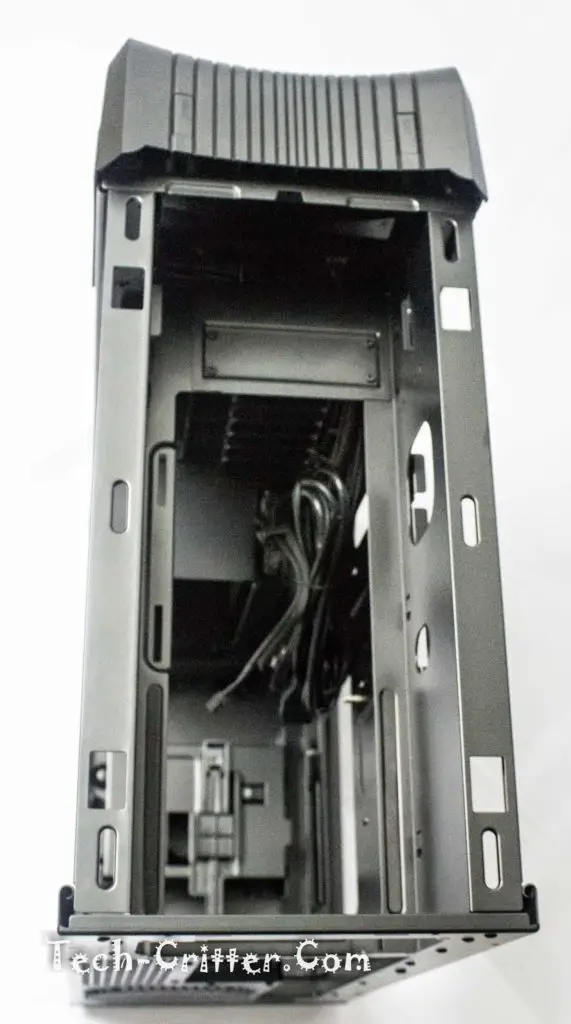
The interior remains much the same as the FT04. From here we can see the huge cut-out at the motherboard tray for mounting third party CPUs, the same drive cage and even the dual HDD bays at the bottom.
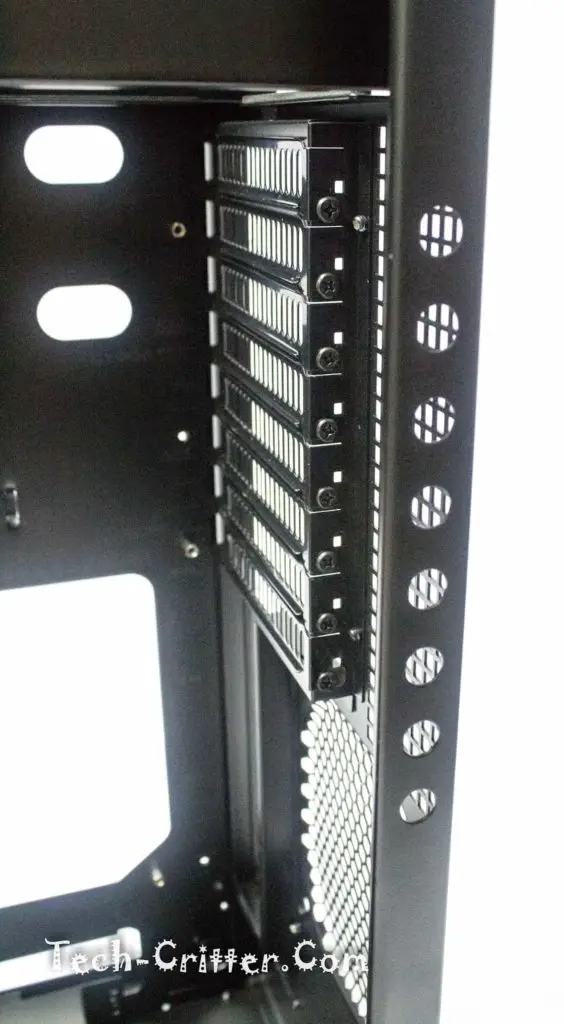
At the front is an air channelling bracket with the HDD drive cage just below, up to five 3.5″ drives may be secure there and it is even layered with foam inside to absorb the vibration generated from the HDDs.
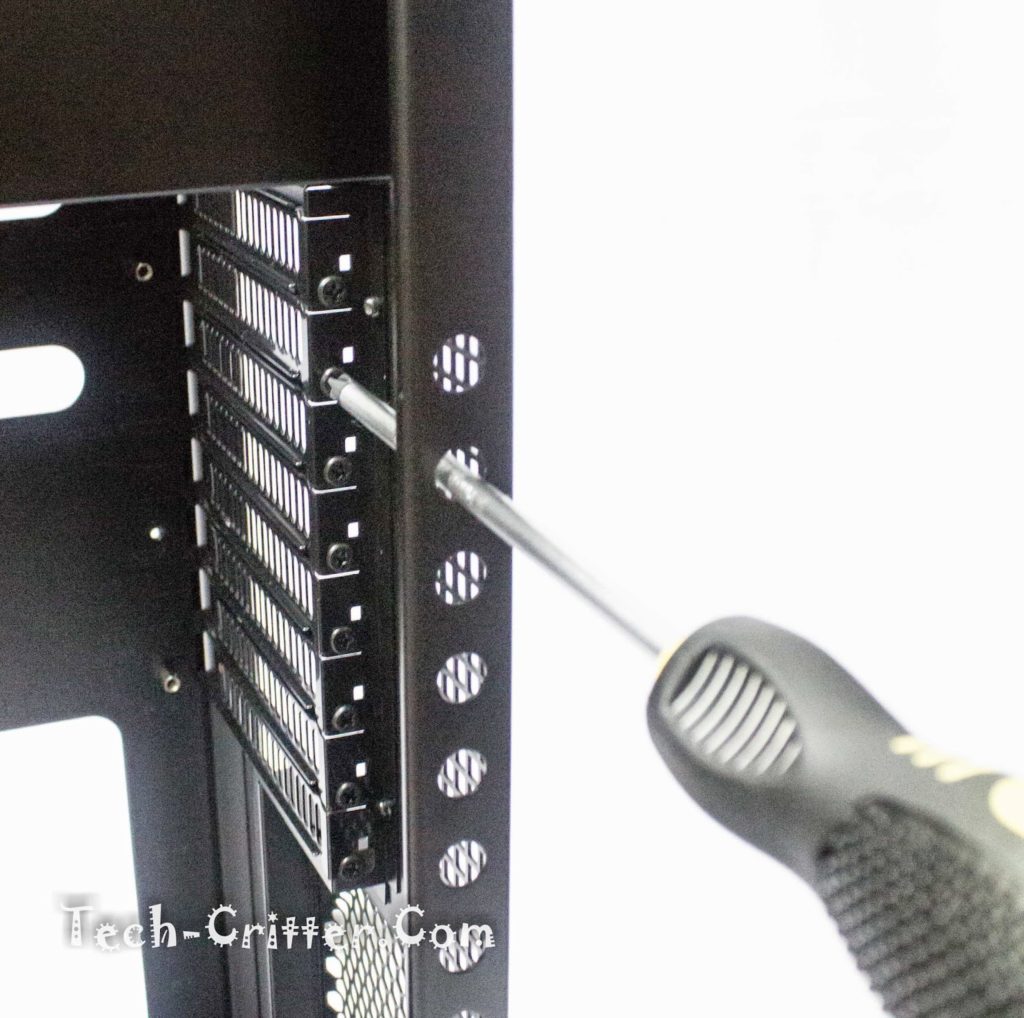
Two hot-swap capable bays at the bottom and a CPU cooler support bracket. Due to the positioning, it’s kinda hassle for HDD placement and removal and unlike the FT04, the hot-swap module is not included in the RV04 but one could purchase the module at a later time should they wish to utilize that feature.
Expansion slots at the back of the Raven 04 is held on with screws instead of the more familiar thumb-screws but Silverstone have made them easy to access by punching corresponding holes at the frame so that a screwdriver could fit through. We still feel that thumbscrews here would be a better implementation here as not everyone will have a long Phillips screwdriver at hand.
Behind the motherboard tray is rather pleasing as well with multiple anchor points for cable ties, openings for cable management and rolled edges to prevent cuts to the cables and user alike.
Yes, the motherboard tray is also removable by undoing a few screws.
Unlike traditional removable motherboard trays, the one on the Raven 04 (and Fortress 04) doesn’t come off with the expansion slots which means that it is only useful for mounting those tricky CPU coolers or if one would want to mod the chassis. Installation of the GPU or expansion cards will have to be done after mounting the motherboard tray back into the chassis. Note that the motherboard tray have six pre-installed standoffs with ruler and motherboard sizes etched all around for ease of reference.
With the motherboard tray back in place, you get about an inch of room for cable management at the back, though I think most of the cables will be routed and stored at the top compartment where the PSU will be mounted.
As mentioned earlier, the top cover is also removable. In order to do this however, one would need to remove the two sidepanels beforehand as well as two more thumbscrews at the back where the dust filter is located.
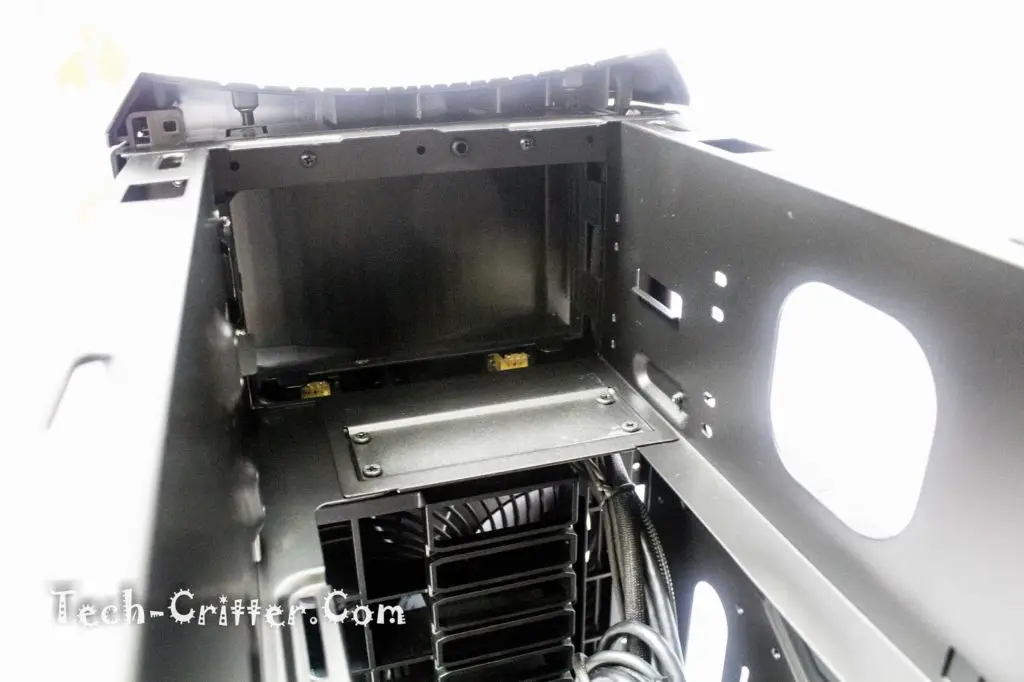
With the top cover removed, we get a full access to the PSU bay area.
Ample space available right to the dual 5.25″ drive bays at the front. The cable routing hole at the side is a nice touch as well which should make cable management a breeze even with a non-modular PSU.
We’re also glad to see that there are 3 long strips of rubber for the PSU support to dampen the vibrations coming from the PSU as well.
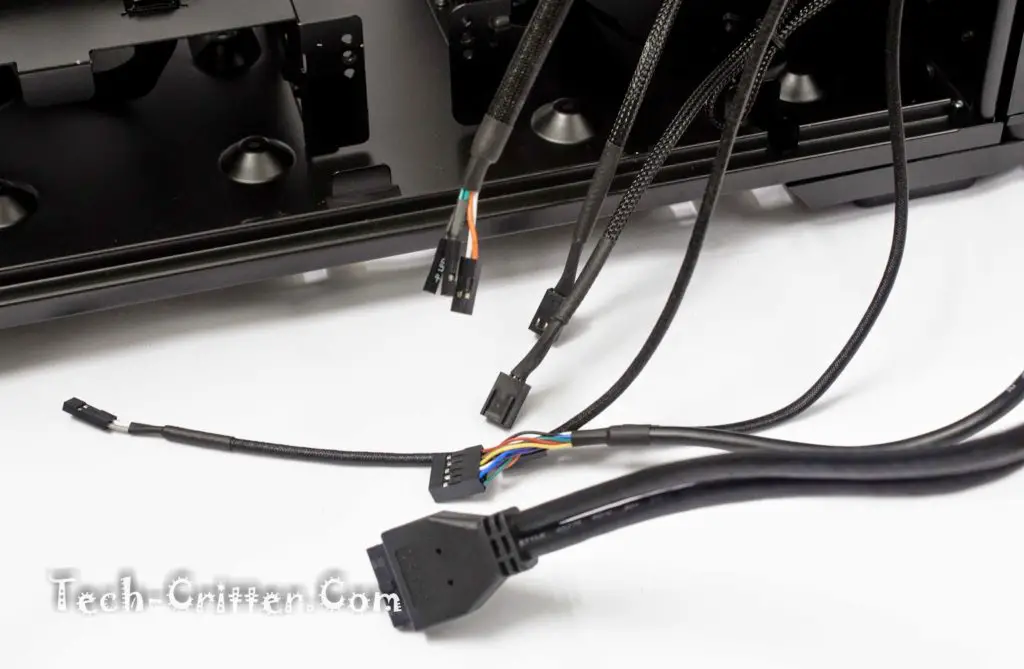
Internal connectors are black in general, sleeved if they are not black by default, a nice touch.
Component Installation
There was more than enough room to work in even without removing the motherboard tray. All the extra cables were easily hidden at the PSU bay area and also behind the motherboard tray without much of an issue.
Here is the cable management done at the back of the motherboard tray. The sidepanel design is the door-swing type which makes it easier to fit all the cables behind.
And this is what most people will look at. Regrettably our white SATA connectors went missing so we had to make do with the rainbow coloured ones coming from the PSU. We actually wanted to place the HDD in the hot-swap capable bays underneath but we notice that the tool-less mechanism holding them still have some movement, especially on the slimmer Seagate 1TB SSHD which is of a concern to us. So to prevent any unfortunate events, we opted for the drive cage instead.
Testing
RIG Configuration:
AMD Phenom II x3 710 Gelid Solutions Black Edition Asus M4N785TD-V Evo Kingston Value RAM 1300Mhz 8GB Seagate 1TB SSHD WD Caviar Blue 1TB HDD Asus 24x DVDRW Sapphire HD7850 2GB Huntkey APSC 700W PSU
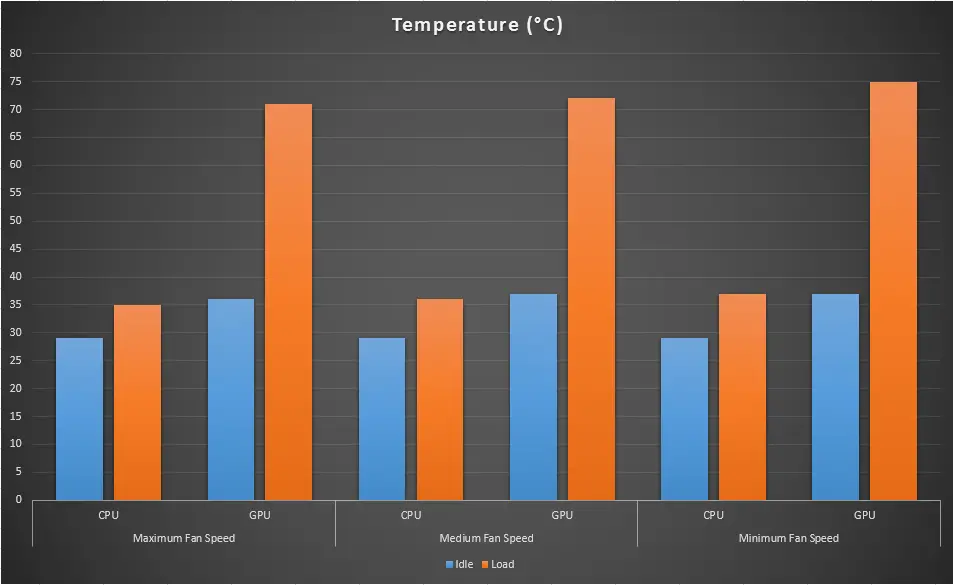
Room temperature is about 27ºC during the test with the usual workhorses being Prime95 on ‘In-place large FFTs’ and Kombustor for GPU stress test for maximum heat output from both the CPU and GPU. System temperature will be monitored using HWMonitor and MSI Afterburner. Note that the system is not overclocked to simulate a plug & play situation.
Tests conducted will consists of the following scenarios:
Maximum fan speed
Medium fan speed
Minimum fan speed
Despite having only 2 fans (very large ones though) the RV04 did very well on the temperatures, the GPU department keeping it below 80ºC at full load at all fan speeds which is a better result compared to when the same GPU was inside the Nanoxia DS1 and BitFenix Shinobi XL.
One thing to note though that this is not a quiet chassis. Cranking the dual AP181 to maximum will generate quite some noise which thankfully is not so with them on minimum speed. With the absence of noise dampening foam, we could also hear the fans from the GPU quite clearly. This is the price to pay for the cooling performance, whether it is acceptable or not will depend on the individual using it as well as what components are used in the RV04.
Conclusion
The Silverstone Raven 04 is the oddball of the Raven family being the only one that doesn’t have it’s motherboard mounted at 90º. Be that as may, the RV04 doesn’t disappoint and did splendidly on cooling and looks. Cable management is very well thought of with the massive top bay that allows for storage of cables and maybe pumps for custom water cooling loops. Almost everything is held on with screws so modularity is a definite plus in our books. Essentially, it’s the same chassis as the Fortress 04 but at a much cheaper price in comparison.
The cooling performance is a trade-off for system noise though so we advise that users choose their components, especially the GPU, wisely to minimise that if it bothers you that much. The trade-off of a watercooling loop is considerable as having to remove the dual AP181 seems to be a bit of a waste of good fans that way. At this price point for a mid tower chassis, people tend to expect having less to compromise especially if they’re not fans of the Raven series to begin with.
Pros
Great build quality
Great cooling capability
Lots of room for cable management
Fan controllers included
Majority of the parts are modular
Dust filters are easy to remove and clean
CPU cooler support bracket included
Cheaper alternative to the Fortress 04
Cons
A lot of screws and almost everything is not tool-free
Top panel can only be removed after both side panels are removed
Front cover hinge doesn’t look good
HDD hotswap bays aren’t secure enough
Installation of SSDs require removal of HDD hotswap bays and also to screw in from bottom.
I guess that given the features, performance and value of the Silverstone Raven 04, it is fitting that it would receive the Tech-Critter Silver and Recommended badges.