I liked the Nanoxia Deep Silence 1 that I reviewed last week and I enjoyed reviewing and testing it. It seems that Nanoxia liked the article as well since they have it posted onto their DS1 microsite, and so I have another one of their chassis, (Thank you APES.my). Introducing the Deep Silence 4, the Micro-ATX version of Nanoxia’s line of German Engineered silent chassis. At RM265 (SRP), the DS4 is placed in contention with Cooler Master’s Silencio 550 but way cheaper to Corsair’s Carbide 330R.
So without further ado, lets “Turn On German Engineering”.
Specs & Packaging
As with the Deep Silence 1, the Deep Silence 4 comes in 3 colour variations, namely Dark Black, Anthracite and White. Spec-wise, it looks heavy for it’s size but I suspect it’s due to the excellent noise dampening materials inside.
At the back, more features are elaborated and depicted.
And the sides will tell you the specs (as above) and the colour of the chassis. Once again, I have the Anthracite coloured model.
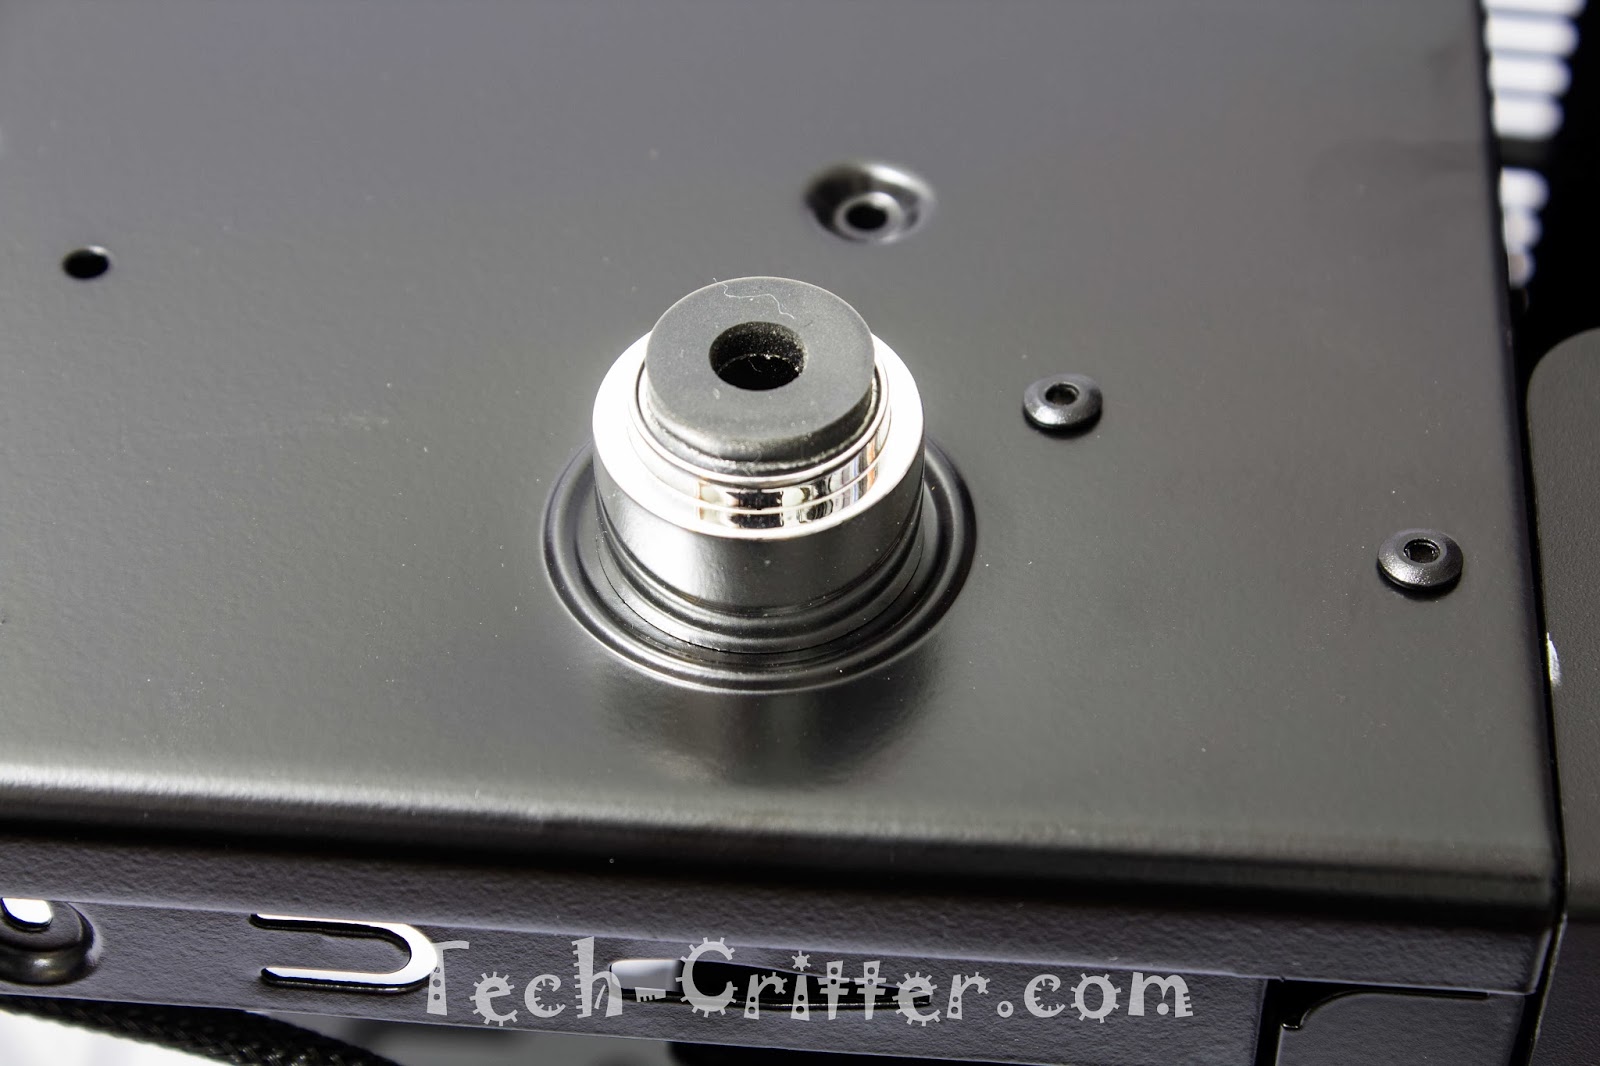
I figured that I’ll cover the accessories that comes with the DS4, do bear in mind that most of these are found inside the chassis (except for the instruction booklet) so don’t freak out if you can’t find them the first place. You would get an 8-pin EPS extension cable, a 5.25″ to 3.5″ front bay converter and cover, 2x solid rubber grommets, a bag of various mounting screws, some cable ties and an instruction manual.
The DS4 is wrapped in plastic and encased in hard foam for transportation.
The Exterior
And here is the DS4 Chassis out in the open! Both side panels are solid and no, there are no windowed version for the DS4 at the moment (sorry to disappoint). The front panel is divided into two sections and covered with a sheet of brushed aluminium and flanking the sides are air intakes to feed the included 120mm fan at the front.
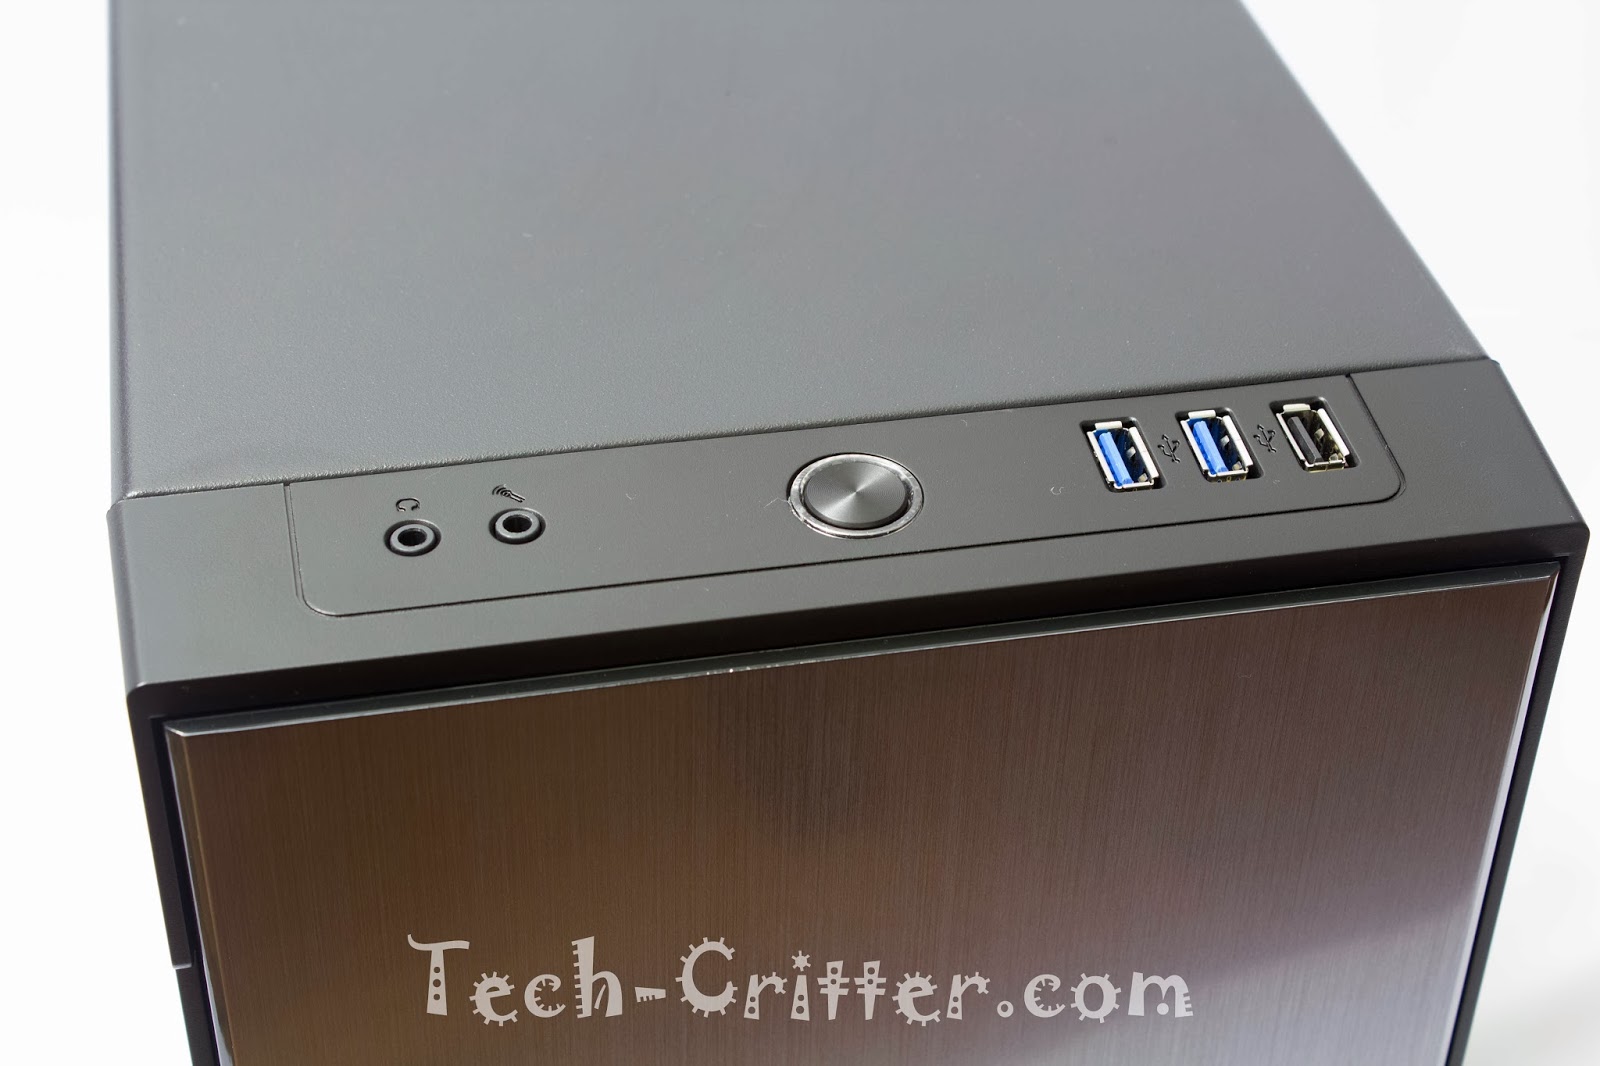
At the top of the front panel, you’ll find the microphone and audio jack, a power button, two USB3.0 and one USB2.0 I/O. The ring around the power button glows green when the system is powered on with an embedded red HDD activity LED, which is the same found on the DS1, nicely done. However, I’m intrigued by the single USB2.0 header because it doesn’t seem that space is an issue here.
You’ll also find a fan mount for a 120mm or 140mm fan at the back of the top panel. Notice that it is currently closed with the sound dampening material with screws.
Only the top section opens up where you’ll gain access to the two 5.25″ drive bays, a reset switch and dual fan controller sliders. Note the noise dampening foam on the door and yes the bay covers do have dust filters.
At the bottom, are four elevated feets with rubber dampener and a removable dust filter over the PSU intake vent. An SSD mount is also present here but the prospect of mounting one will mean that you’ll need to access the bottom part of the DS4 to screw them in securely.
The Interior
Sliding off the two side panels, we’ll see the bitumen-compound soundproof material that made the DS4 a silent chassis. Compared to the traditional foam type, these are more robust and will not lose shape when pressure is applied.
The DS4 has a classic all-black interior, simple and clean with a large CPU area cut-out for mounting third party HSF and well placed rubber grommets on the motherboard tray. But I noted that the motherboard tray is a bit wobbly and the rubber grommets comes off quite easily, not what I was expecting from Nanoxia honestly.
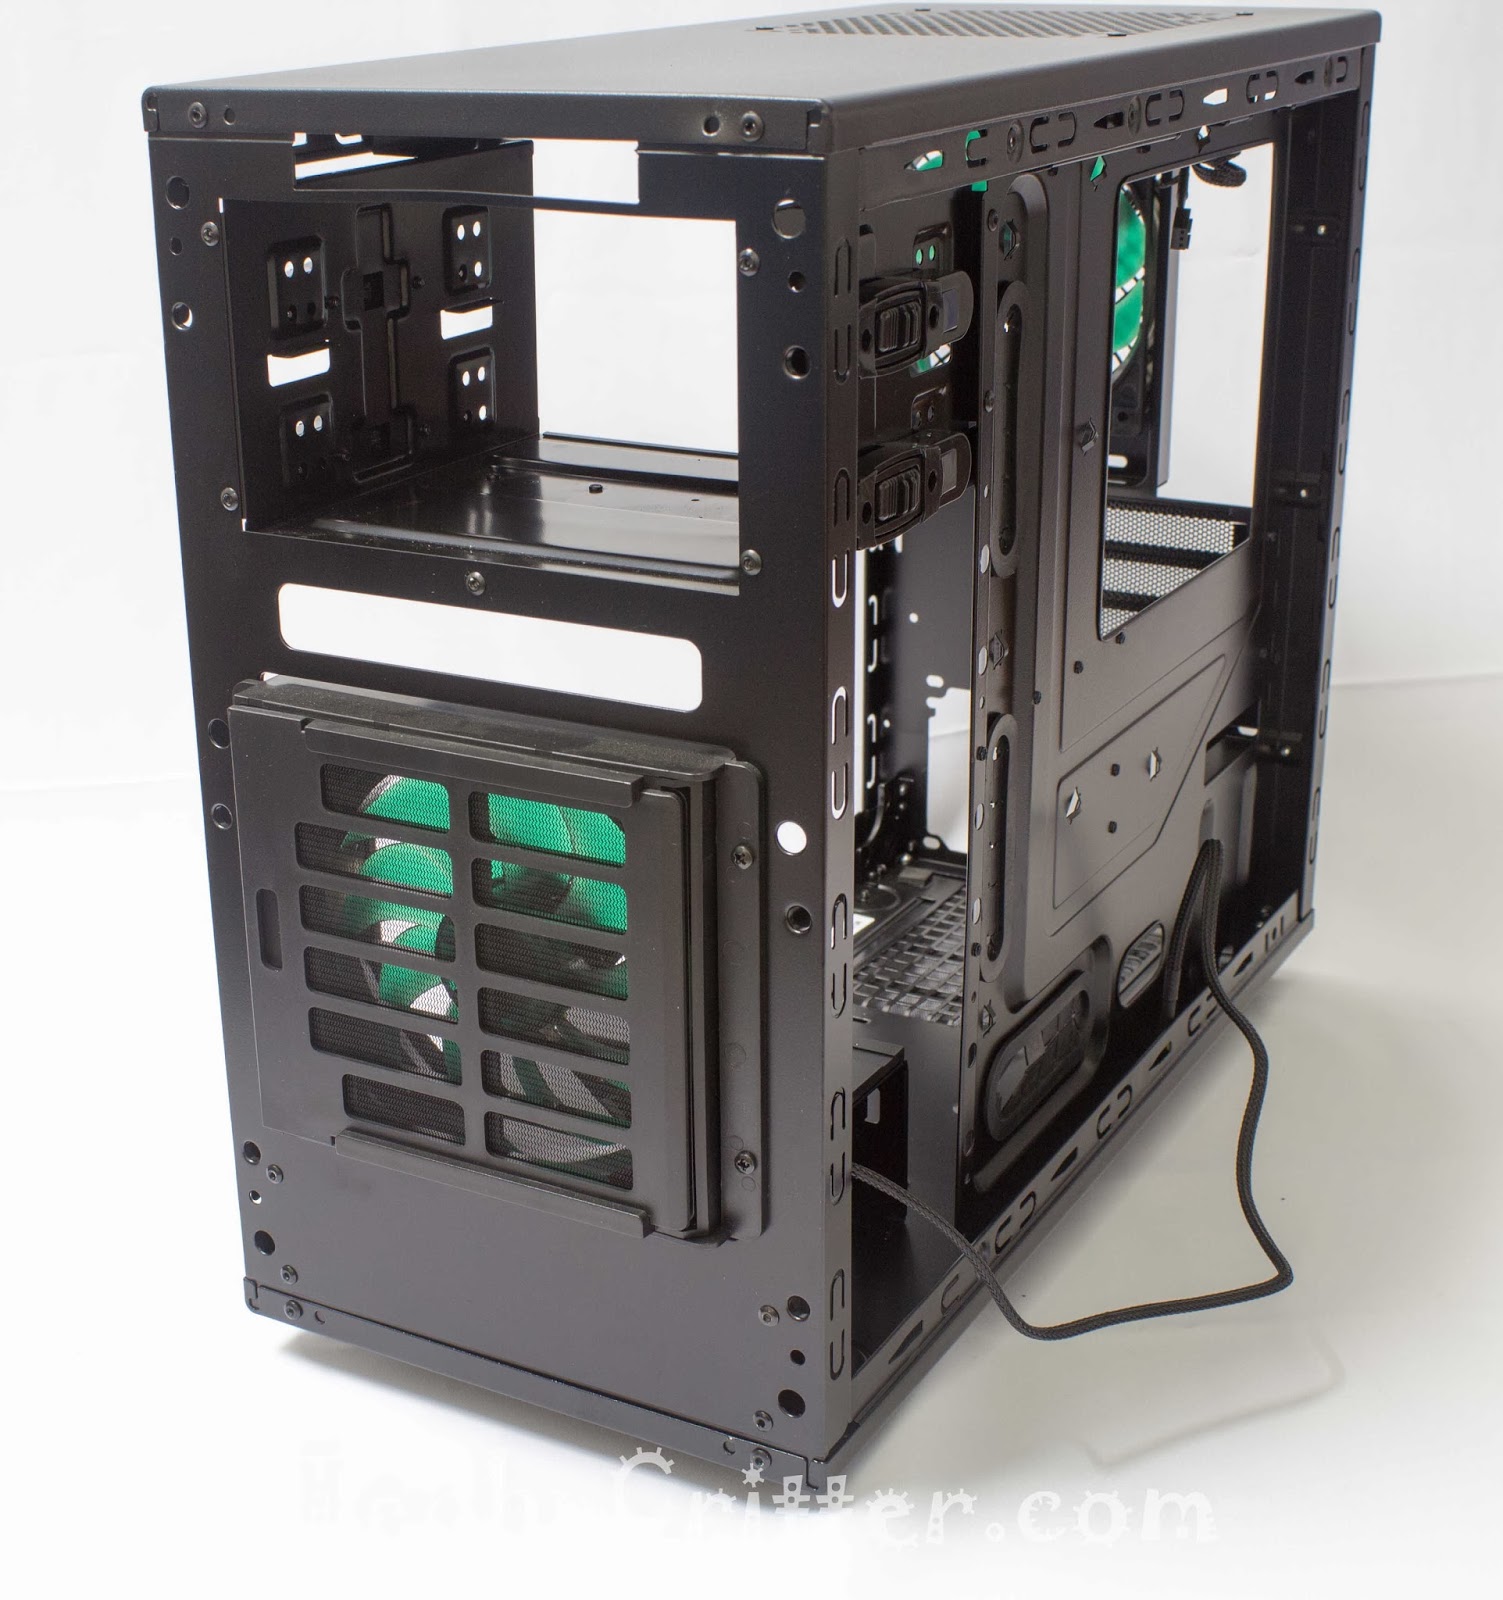
Modular drive cages is always a welcomed feature, especially when you want to fit long GPU or water-cooling solutions. As for the latter, you could fit 120mm radiators at the front and the back.
The PSU mount area is supported by four small foam feet instead of the usual rubber mounts. though it should be sufficient to reduce some vibrations coming from the PSU.
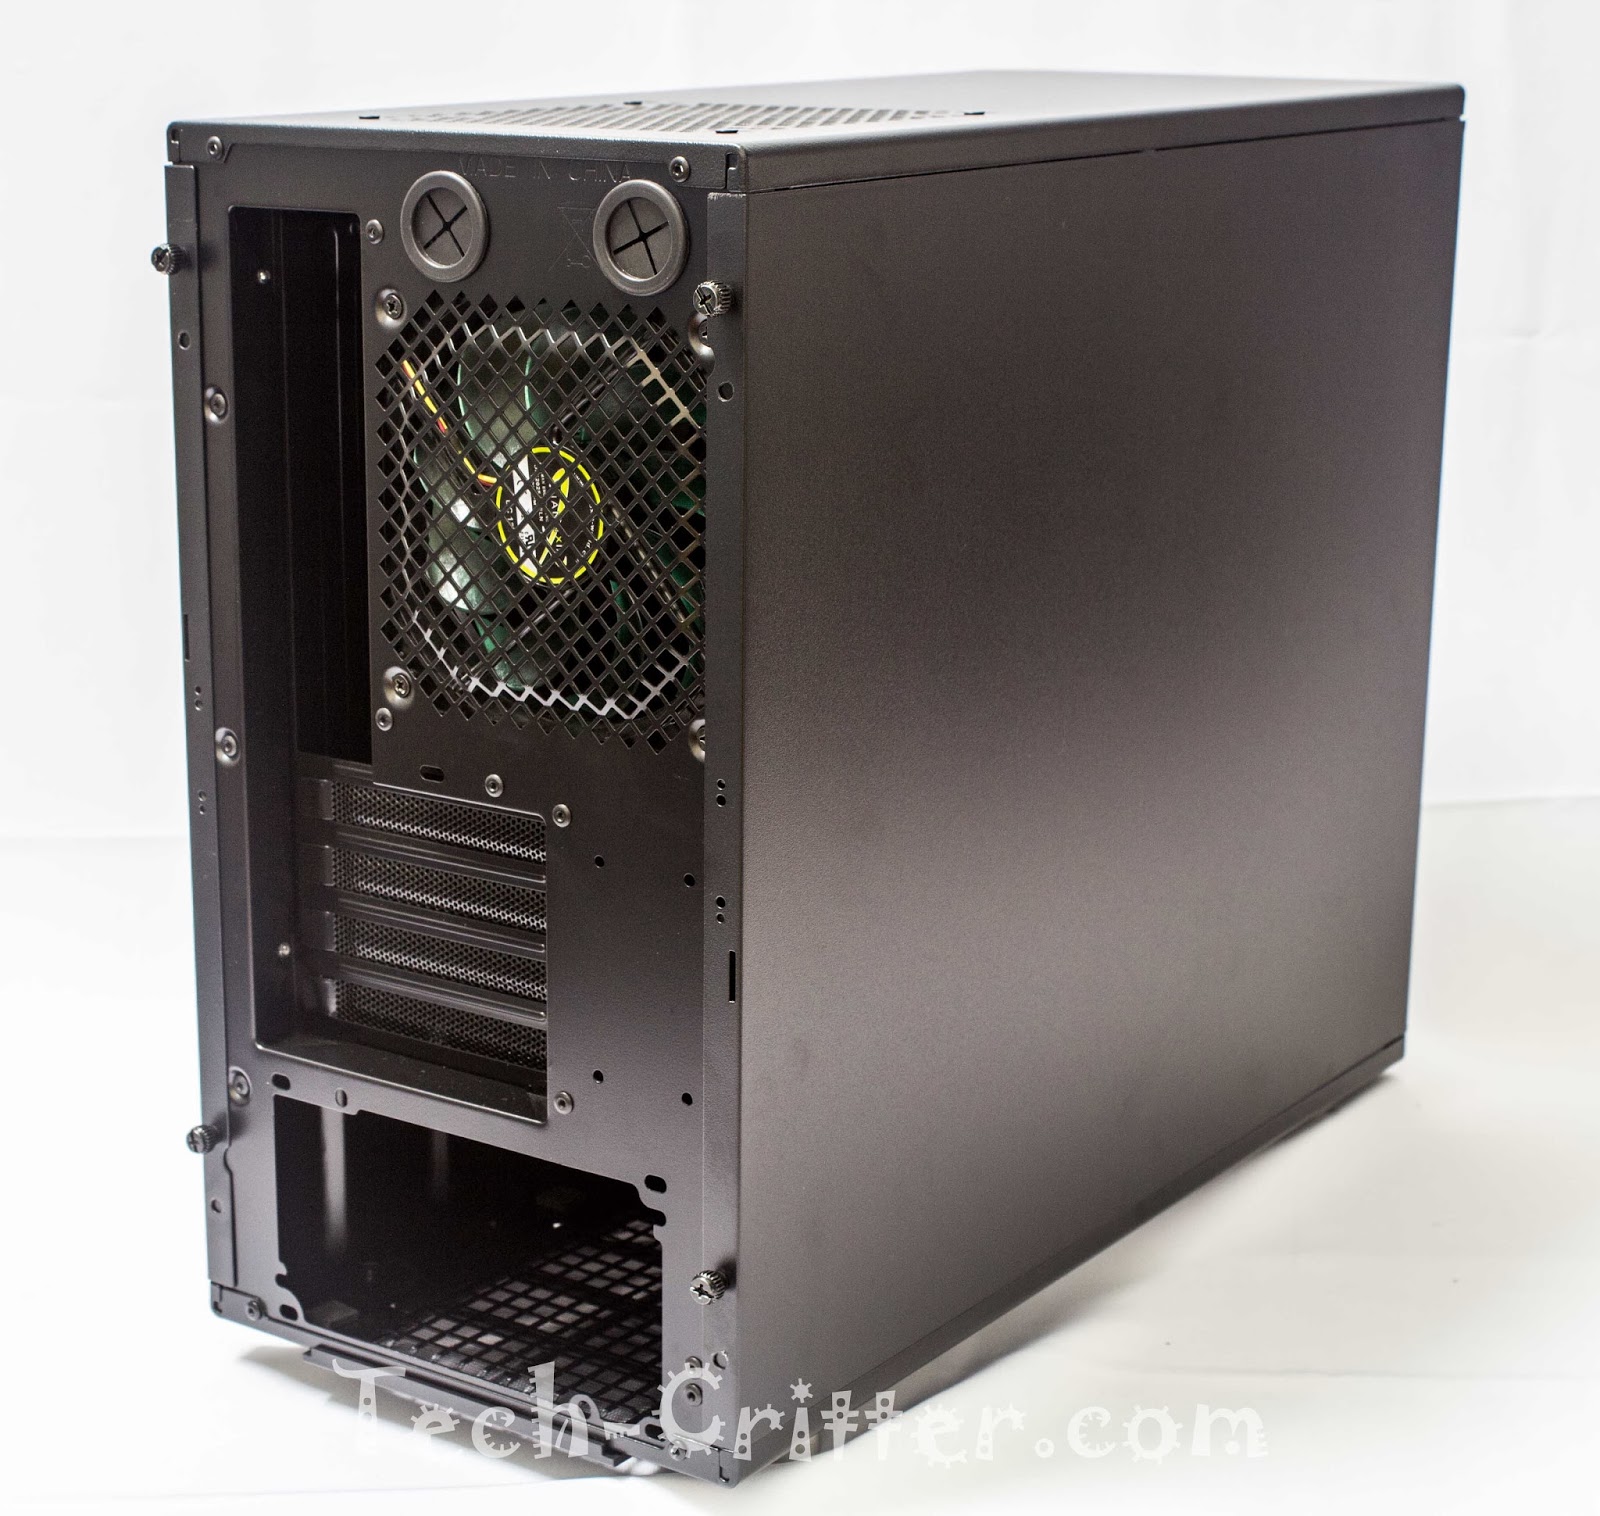
Up above that are the four expansion slots.
And right above that is the 120mm exhaust fan.
The back of the motherboard tray we have very few cable tie mounts.
And a very small gap for cable management. Once again, use of modular PSU is recommended.
And the fan controller connectors for up to six fans… I wonder where would one mount the other three given that the DS4 can support a maximum of only three fans. Generous but weird don’t you think?
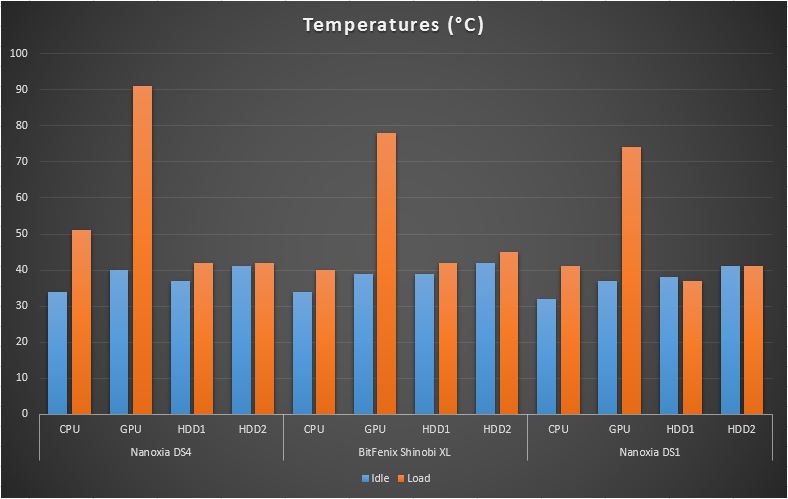
I’ll still place the sound emission results here compared to the results from the Nanoxia DS1 and the BitFenix Shinobi XL, but do bear in mind that the DS4 is only equipped with 120mm fans at the front and the top while the cooler is a CM Hyper 212+ with BitFenix Spectre Pro LEDs on push-pull config. The only component that stays the same is the GPU which I will crank the fan up to 100% speed to record the noise generated.
Temperatures will be recorded using HWMonitor. Prime95 and MSI Kombustor will help out in the load test. Everything is on stock settings so we’re looking at what kind of noise and temperatures a normal gamer will hear and feel.
one last thing before the results, the components used 🙂
AMD PhenomII x3 710
Asrock 960GC-GS FX
Cooler Master Hyper 212+
Sapphire HD7850 2GB
Samsung HD 502J (HDD1)
Western Digital WD10EALX (HDD2)
Huntkey ASPC 700W
The performance of the DS4 really is commendable. Temps are very good on idle, only a few degrees toastier than the other two chassis. We do expect the system to get a bit hot as well on load but the DS4 did marvellously with the load temps despite it’s smaller stature.
Do not be too alarmed with the GPU temperature on load as we’re talking about the GPU being pushed at 100% with the Kombustor. Tested it with a game or two, the temps hover at around 70 degrees Celsius so it’s definitely acceptable as a gaming chassis, just not recommended as a load testing system.
- Elegant looks
- Use of Bitumen-compound sound proofing material
- Modular HDD cage
- Included fan controllers
- Fits 160mm after-market coolers
Cons:
- Flimsy construction on some areas
- Lack of space behind the motherboard tray
- Access to front 120mm fan isn’t ideal
- Messy front I/O connectors
- Use of foam as PSU support instead of rubber
- Top panel is not accessible
I do have my qualms on the DS4, but the product is unique nonetheless as there aren’t too many noise suppression M-Atx chassis out there… not to mention not all of them are as packed with features as the DS4 so it still deserves the Tech-Critter silver award.


.jpg)
.jpg)
.jpg)
.jpg)
.jpg)
.jpg)
.jpg)
.jpg)
.jpg)
.jpg)
.jpg)
.jpg)
.jpg)
.jpg)
.jpg)
.jpg)
.jpg)
.jpg)
.jpg)
.jpg)
.jpg)
.jpg)
.jpg)
.jpg)
.jpg)
.jpg)
.jpg)
.jpg)

2.jpg)


