Why a fan controller you might ask? my reason is simple, I would like that my components are cooled efficiently with the least amount of noise emitted from the fans I deployed in my PC chassis. it doesn’t matter if your PC is air-cooled or water-cooled, you’d still need fans. Having a non air-conditioned room in a tropical weathered country like Malaysia sure doesn’t help so here is where the BitFenix Recon comes to play.
Available in black or white for about RM150 in the local market, it’s decently priced for what the Recon offers so lets see what can be expected from this little package.
Materials | SoftTouchTM, ABS Plastic, Steel |
Dimentions | 147mm x 43mm x 67mm |
Form Factor | Single 5.25” Drive Bay |
Fan Channel | x5 |
Temperature sensors | x5 |
Max Watt/Channel | 10W |
Measurement Frequency | Between 0.1-0.4 Seconds |
Temperature Alarm Range | 30 Degrees C – 90 Degrees C |
Temperature Range | 0-100 Degrees C |
Screen Size | 4.7″ |


The retail package of the Recon comes in a small, shiny overall black & green box with plastic shrink-wrap (helps keep the product dust free). I find that the package is attractive with the front having showing us how the product looks like out of the box.
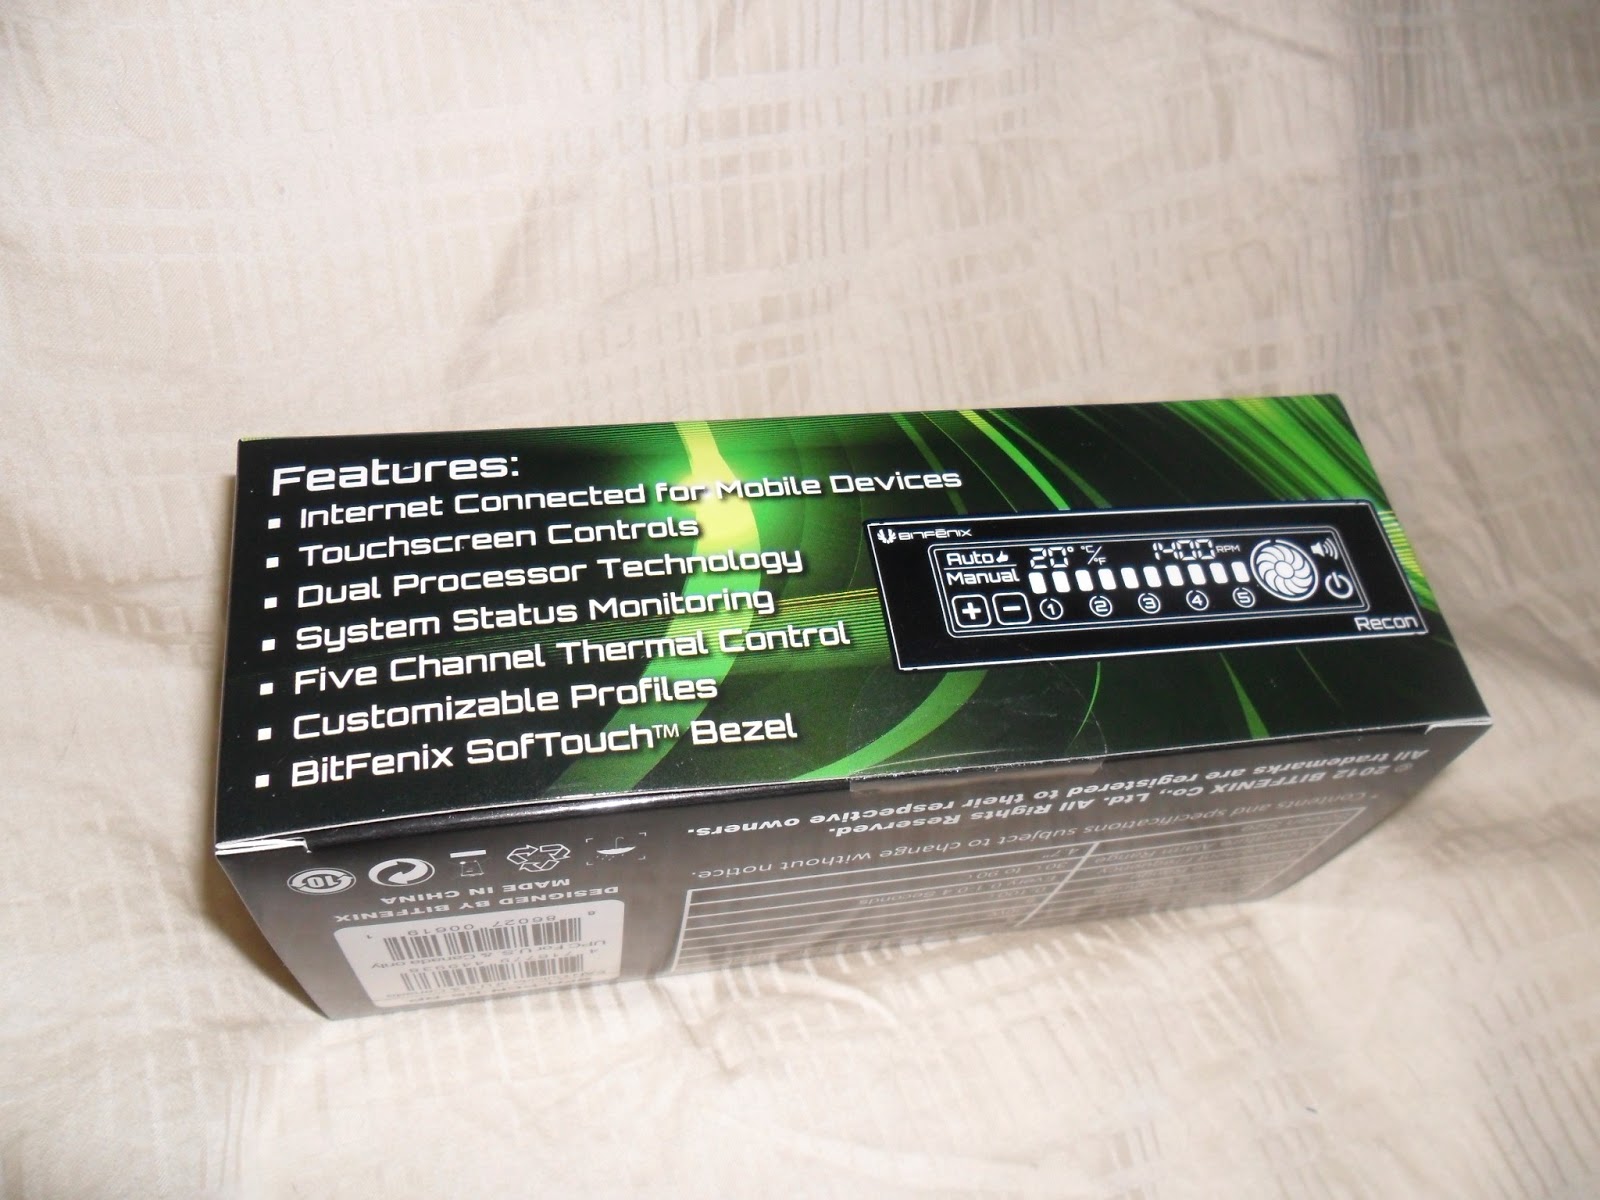
At the sides, the package is plastered with a list of the key features, of which some is unique to the Recon. You’ll also find the specification table at the bottom of the package.


Opening the package, I’m glad that BitFenix have once again been vigilant of their packaging; inside, the Recon is wrapped in a reddish anti-static bag, accessories are tucked in between the wiring topped off with soft foam at both sides of the Recon that protects the unit from shock and damage during transport.

The Controller

The Recon requires only a single 5.25″ drive bay, even so, I was taken by surprise by how heavy and solid the unit feels. The plastic front bezel is coated with BitFenix’s trademark SoftTouch treatment that gives the product the premium feel and you could see the white BitFenix and Recon Logo etched at the top left and bottom right. Just so you know, there is also a white version so that owners of white BitFenix chassis could match the exterior looks of their chassis.

Behind the bezel, we could see dual custom microprocessors soldered neatly on the PCB. These are the brains that enables the Recon to interact with the motherboard via the USB connection. Other components are well spaced and the soldering job is very neat. All the cables are modular so anyone could replace them with custom cables or even sleeve them should they wish to. Though I doubt most of us will bother sleeving the cables we’re hiding anyway :p. You would need to remove some of the glue that’s stuck to one of the temperature probes but it shouldn’t be a big issue.
Now I know the picture showed a bird’s nest for the cabling behind the bezel but in fact it’s pretty organized. Bundled and tied with twist-ties according to cable type, it only took me a few seconds to sort out the different cables connected to the Recon.


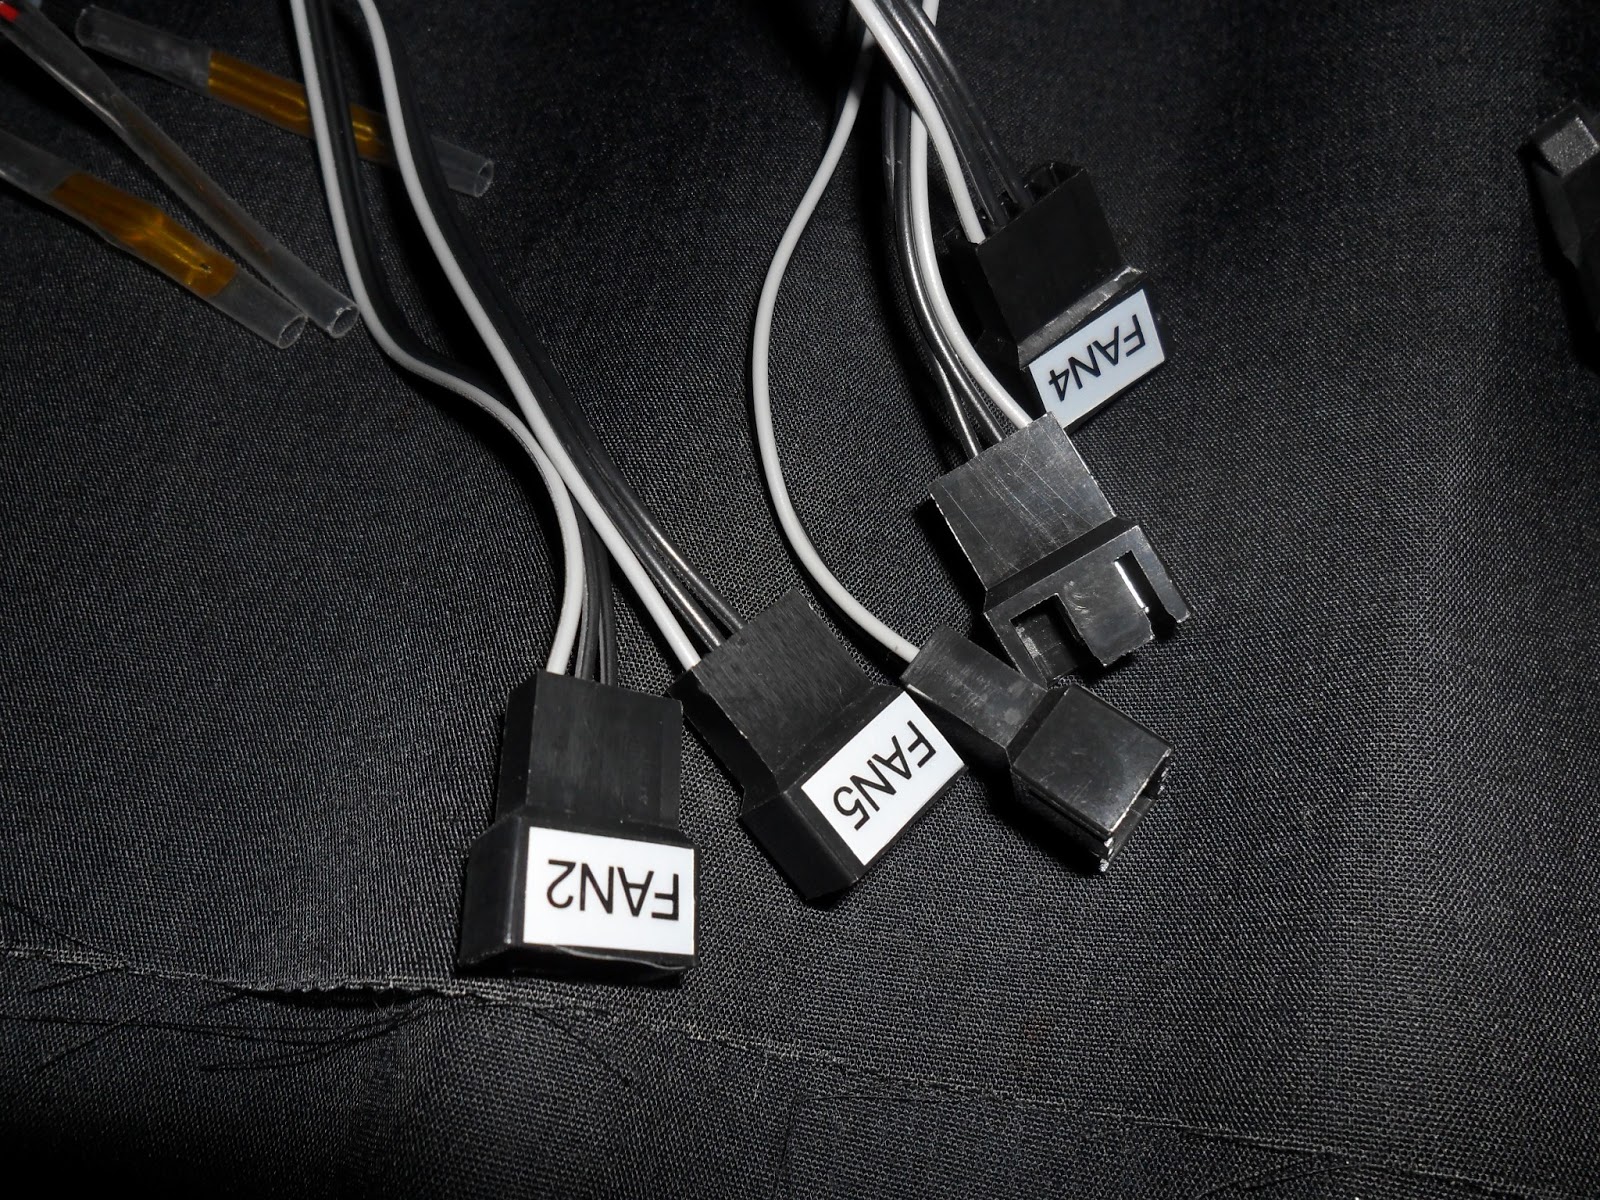
The cables consist of 5 fan headers, 5 temperature sensors, a 4-pin molex connector (for power) and a USB data cable, all of which are labelled clearly so that you’d know which fan corresponds to the channel you’re gonna be adjusting once you’ve mounted the Recon. Cables quality is very good and feels different from your run-of-the-mill wires that one would find in the local hardware shops.
Looks like I’m gonna have an easy time routing the cables in the BitFenix Shinobi XL (not that it was any harder the first place), the cables are quite long and will reach anywhere in most full tower chassis, so therefore it shouldn’t be a problem for mid towers (which most of us are using) at all.

I’m also glad to see that the temperature sensors are very thin (and they give 2 extras just in case). This makes it easier for me to stash between the crevices of any components in the chassis. I do find the USB cable a bit strange as it has two USB connectors, with one terminating right before the other as opposed to having only one connector at the end, strange but I don’t think this will affect the functionality of the Recon.
Mounting the Recon
Sliding the Recon into the vacant 5.25″ bay of the Shinobi XL and securing it with the tool-free mechanism is a no-brainer but one could also mount the Recon using the screws provided in the package. After placing the temperature sensor s to key points in the Shinobi XL and plugging in the fans, remember to plug in the USB cable to the USB2.0 for the added “advanced” features of the Recon, in which I’ll demonstrate in a while with a video in this review. Finally, connect the 4-pin molex to the PSU where the unit receives its power.
Temperature Sensor | Location | Fan Connector | Location / Fan Type |
Lead 1 | Base of CPU Cooler | Fan 1 | CPU Cooler push |
Lead 2 | Lower fin of CPU cooler | Fan 2 | CPU Cooler Pull |
Lead 3 | Back of front 200mm intake fan | Fan 3 | Front 200mm intake fan |
Lead 4 | Back of GPU Chip | Fan 4 | Chassis rear Exhaust fan |
Lead 5 | Middle of chassis | Fan 5 | 200mm top exhaust fan |
Touch Screen Operation.
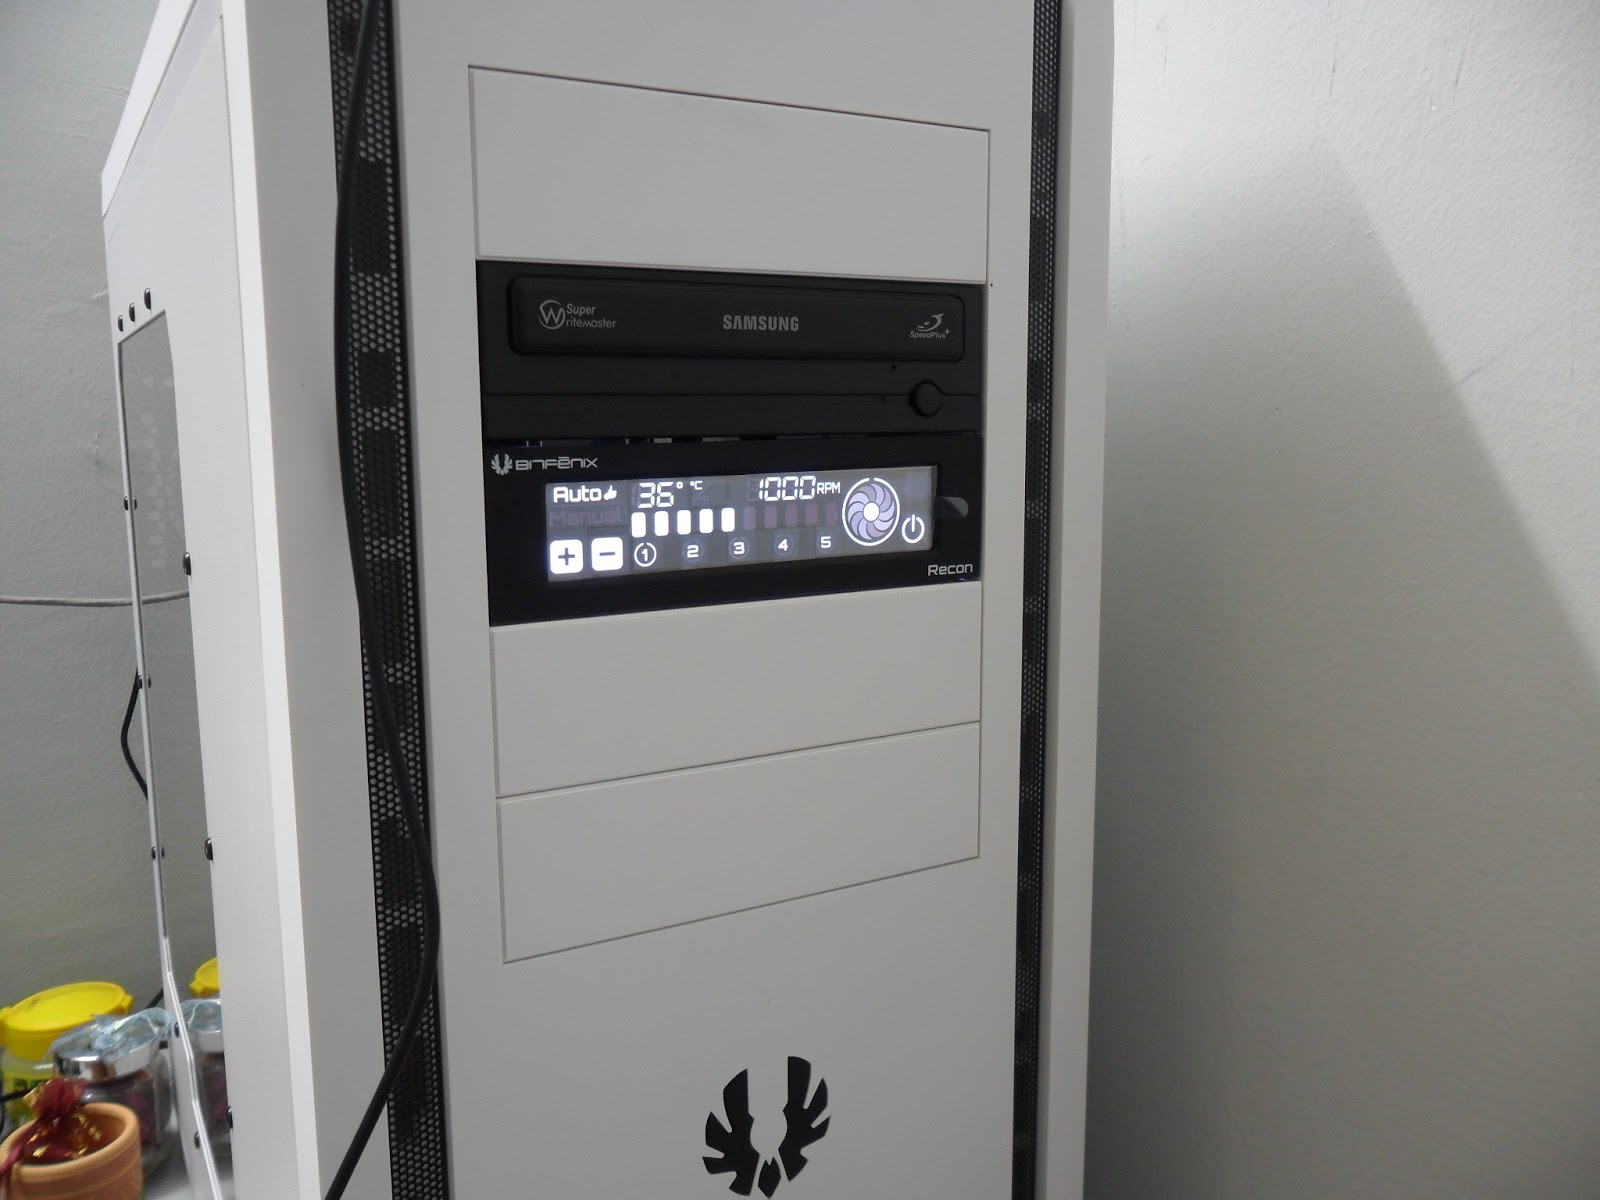
Having the BitFenix Recon installed in the system sure made a difference to my rig. For one, I’m able to run my fans at the speed I want, minimising noise while I am watching a movie or listening to soft music and jacking up the fan speed when I’m gaming or running heavy loads on the processor. Though to be honest, hiding the wires tend to be quite a chore, especially for first timers.
The touch interface is responsive and easy to operate, although I wish that the screen would be a bit larger but it gets the job done fine enough. What is unique to the Recon however, is the web interface that updates the temperature, fan speed, voltage, etc on-the-fly and lets you adjust them whenever from wherever you’re connected from. Since it’s accessible via any web enabled device, any Notebook, Tablet and smartphones would work. I find it especially helpful when I’m away from my PC that is running torrents or when I’m too lazy to get up (or bend down, depending on your chassis placement) to use the touch screen when I want to watch a movie while seated a few feet away. Finally, I don’t have to even remember each fan’s setting; with the presets available, a press (or a touch) of a button instantly sets the fans to my desired speed (naming them helps too); other than that, there is always the auto function that runs the fans according to the temperature probes.
Between getting the BitFenix Recon and enjoying it, there are some challenges that must be overcome. I’m of course not only referring to the tasks of routing the wires but the setup of the web interface as it does require a bit of tinkering with the network settings and having administrator rights in your PC so you’ll need to do some extra bit of reading to complete the setup. Thankfully, there are a lot of guides online that one could follow step by step to complete the task.
Pros:
- Good Build Quality
- Affordably priced
- Unique one of a kind web interface
- Easy to use
- Setting up requires some degree of networking know-how