So previously, we reviewed the Synology DiskStation DS920+ and within that review, we highlighted a bunch of different features available – all thanks to the power of Synology’s DiskStation software. One thing that we want to highlight today, is the benefit of diving into the Synology ecosystem – especially for small-medium enterprises (SME) like us.

You see, one major problem when it comes to SMEs like us is the cost for us to set up a proper infrastructure to back up and share files within the company. We could just pay for other cloud services to handle all of our data – but that means any sort of interaction with our data will have to go through their servers. Especially for us, we have lots of large pictures and videos that are just inefficient if we are to rely on cloud services.
 Double 8TB drives for now. We can always expand later.
Having a NAS comes with a few pros and cons for this matter. The biggest pro is that we can access the files quickly when we are connected to the same local area network (LAN) as that NAS. It’s quite literally direct access.

However, the biggest problem is that we have to rely on our own when it comes to data backups. Sure, the Synology DiskStation DS920+ comes with 4 bays and we can stripe them to use something like RAID10. But whenever that NAS goes offline – or if it somehow gets damaged – all our data will be lost. Gone. Unrecoverable.

To prevent such a calamity from happening, is to have an offsite backup. There are multiple ways to create an offsite backup. I even used my own personal desktop as the offsite backup for the office’s NAS too. But that’s very inefficient as my desktop requires a lot more energy to keep running.
What we’re dealing with
So, when I got my hands on the Synology DiskStation DS920+, I was immediately intrigued by the idea of using it as the offsite backup of our office’s Synology DiskStation DS420+ NAS. Since these are two Synology NAS running the DiskStation firmware, I want to explore how easy it is to actually set up the NAS as offsite backup.
In summary, we have two NAS and here’s what we’re going to do:
- Office NAS: Synology DiskStation DS420+
- Offsite backup: Synology DiskStation DS920+
Choose what type of offsite backup you want
Surprise! Synology actually has two different methods for us to setup an offsite backup. Here’s a quick summary of it:
- Hyper Backup: Convert one NAS to become the “main” and the other one as the “secondary” unit. The “secondary” unit will only download from the main NAS and never uploads.
- Synology Drive ShareSync: Sync between both so you can upload files to either NAS and it’ll be mirrored to the other NAS.
I tried both methods before settling with method number 2 because the offsite backup NAS is also partly my personal storage device and I don’t want anyone else accessing any part of it.
Either way, let’s quickly run through how to set up the backup methods.
1. HyperBackup so that the secondary NAS only downloads from the main NAS
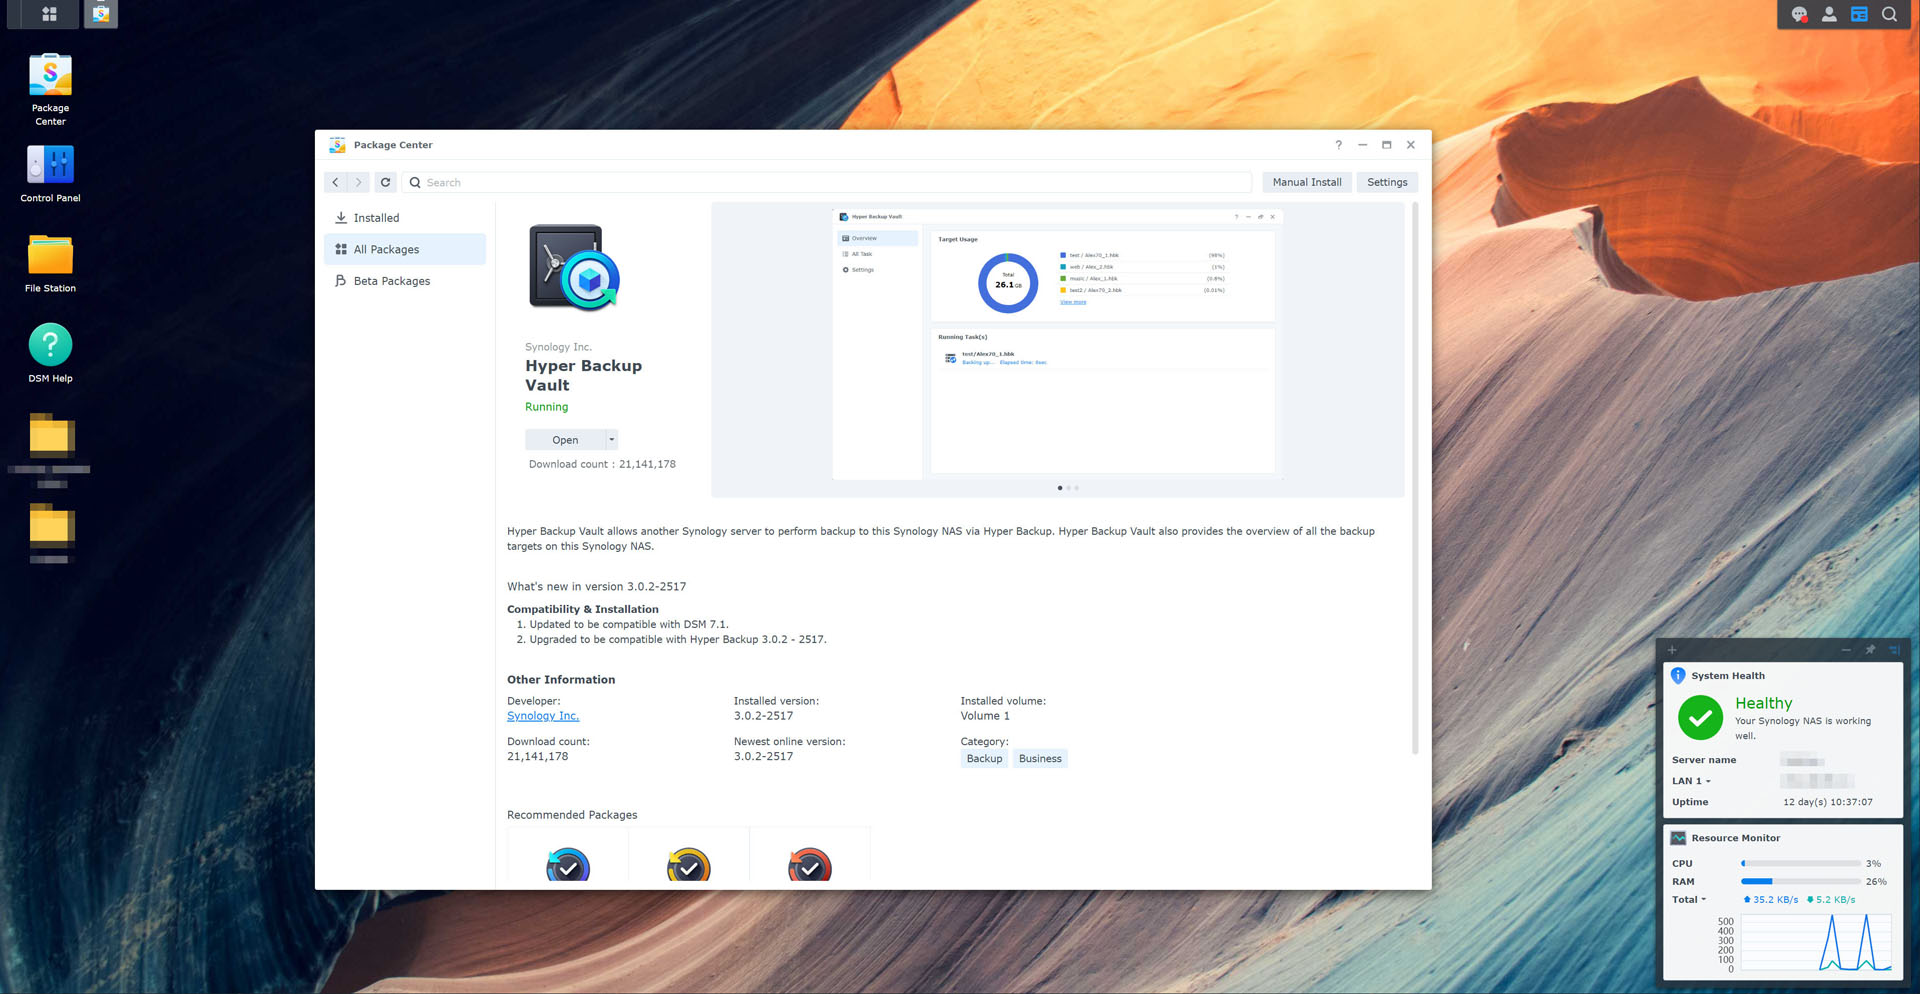
This is extremely straightforward. Just head into the Synology DiskStation Manager and go into the Package Center and download HyperBackup. It’s free.
Let’s deal with the main NAS first – as in the host NAS. There are quite a lot of settings to be done.
But before we do anything else, we need to ensure that these things are done in this order:
- On the main NAS
- Install Hyper Backup Vault
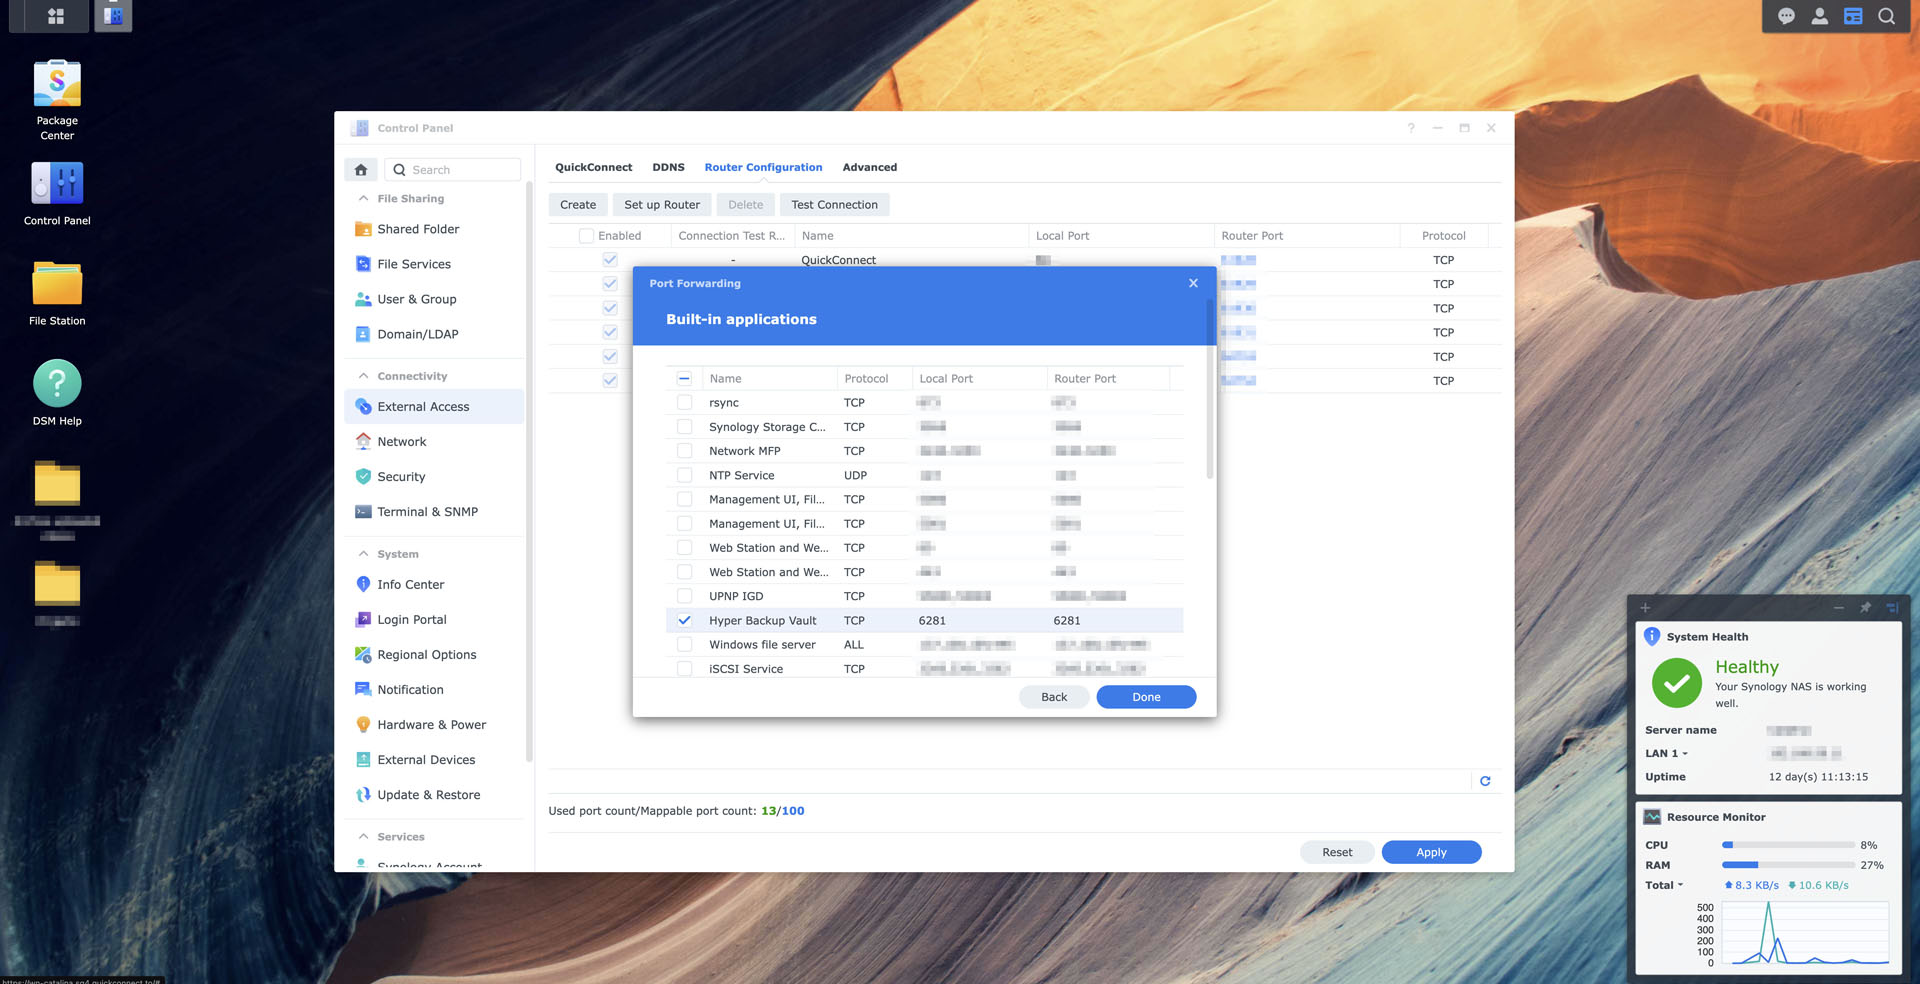
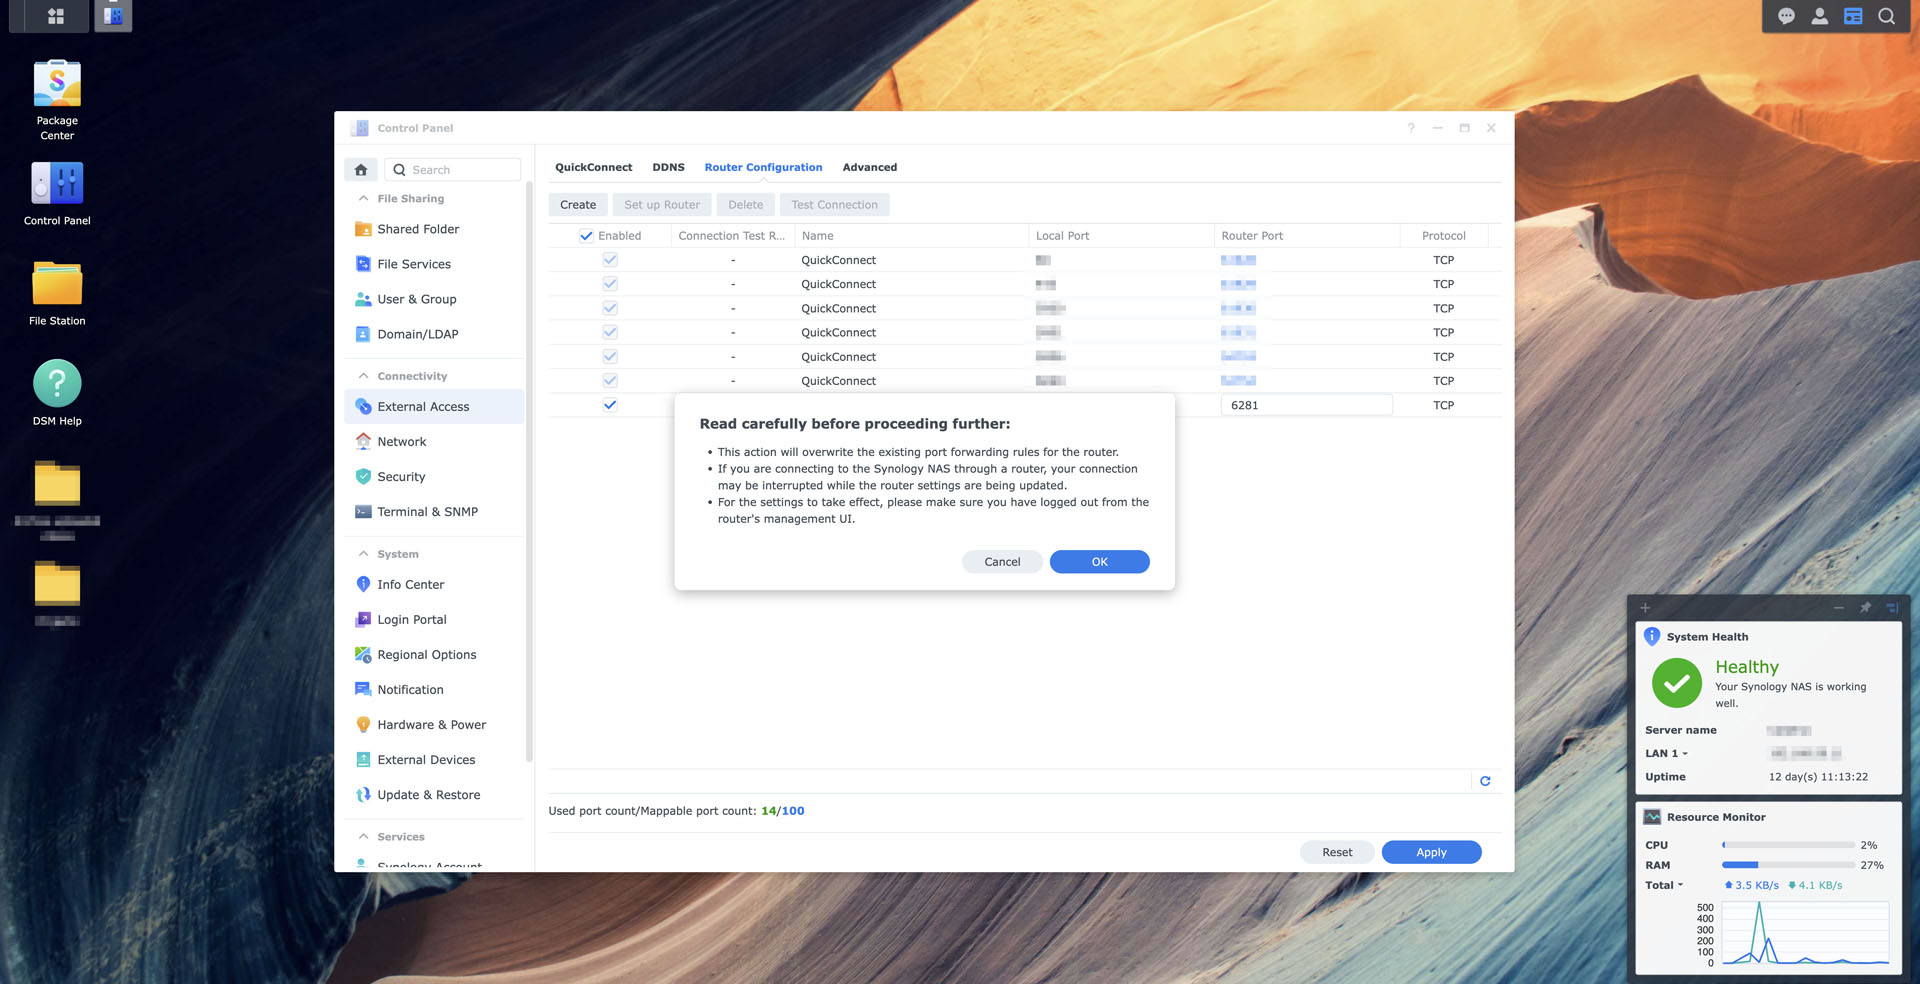
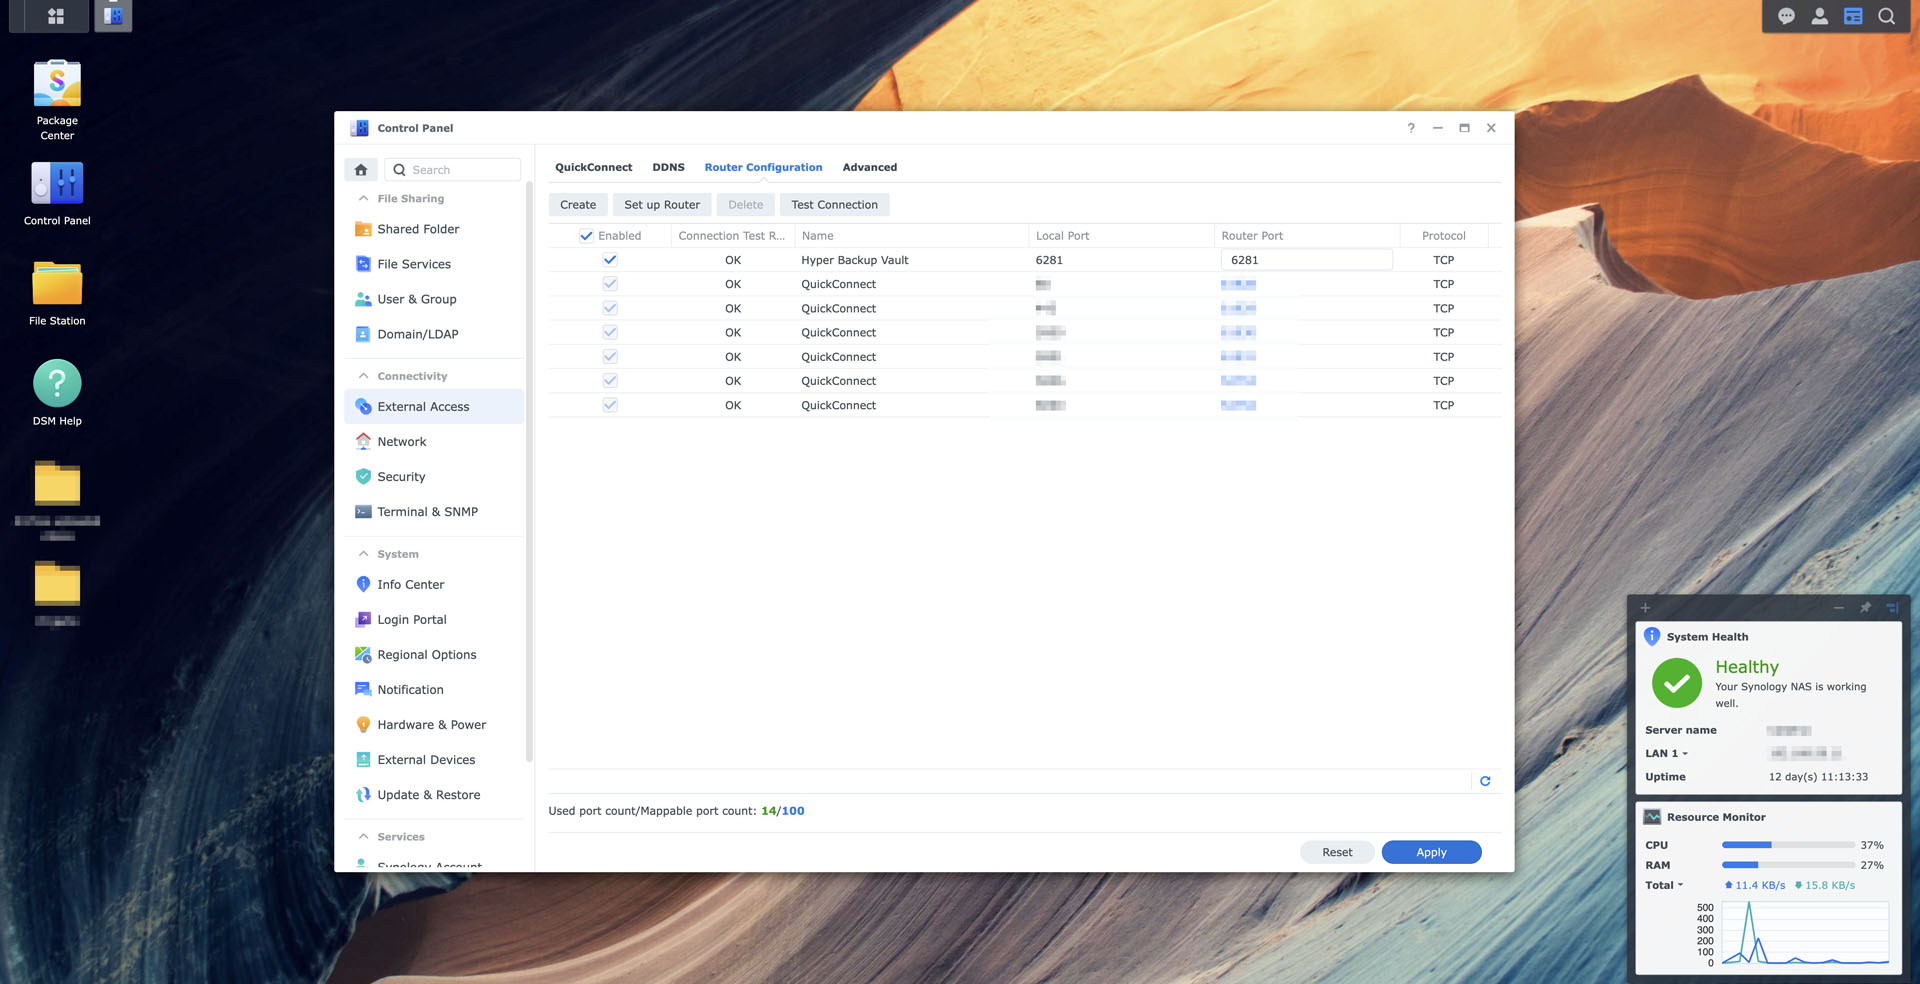
- Head into the router configuration menu and configure port forwarding for the Hyper Backup Vault app
- Find out the NAS’s server name (only usable for LAN) or external IP address (across the internet)
- On the secondary NAS
- Install Hyper Backup
To install the Hyper Backup and Hyper Backup Vault, they’re available in the Synology Package Center. Just head on over there can you can find it immediately.

After installing the Hyper Backup and/or the Vault, you’ll need to go into the router configuration menu in the control panel to configure the port. Luckily, Synology made it easy and already set the default port for you. Just click on the app and it will forward the port for you.


To find the NAS’s server name, we’ll also need to go into the control panel and go into “external access”. From there, we can see the server name. This name is different from the Synology QuickConnect ID. This method also only works if both NAS are connected to the same local area network (LAN).
To find the external IP to make use of Hyper Backup across the internet, then head into control panel and click here to find.

Then, start the HyperBackup and the interface is supremely simple. Follow through the steps and add a task, select “remote NAS” and enter the appropriate information. You can change the port number if you want to – just make sure to forward that port as well. We’ll keep it at default.
After that, you need to gather some information from the main NAS:
- The main NAS’s external IP address
- Login ID and password from the main NAS
The steps are pretty self-explanatory. We screenshot the step-by-step process for you so you can have a look and follow it though. Remember to click on “log in” after entering the external IP address.


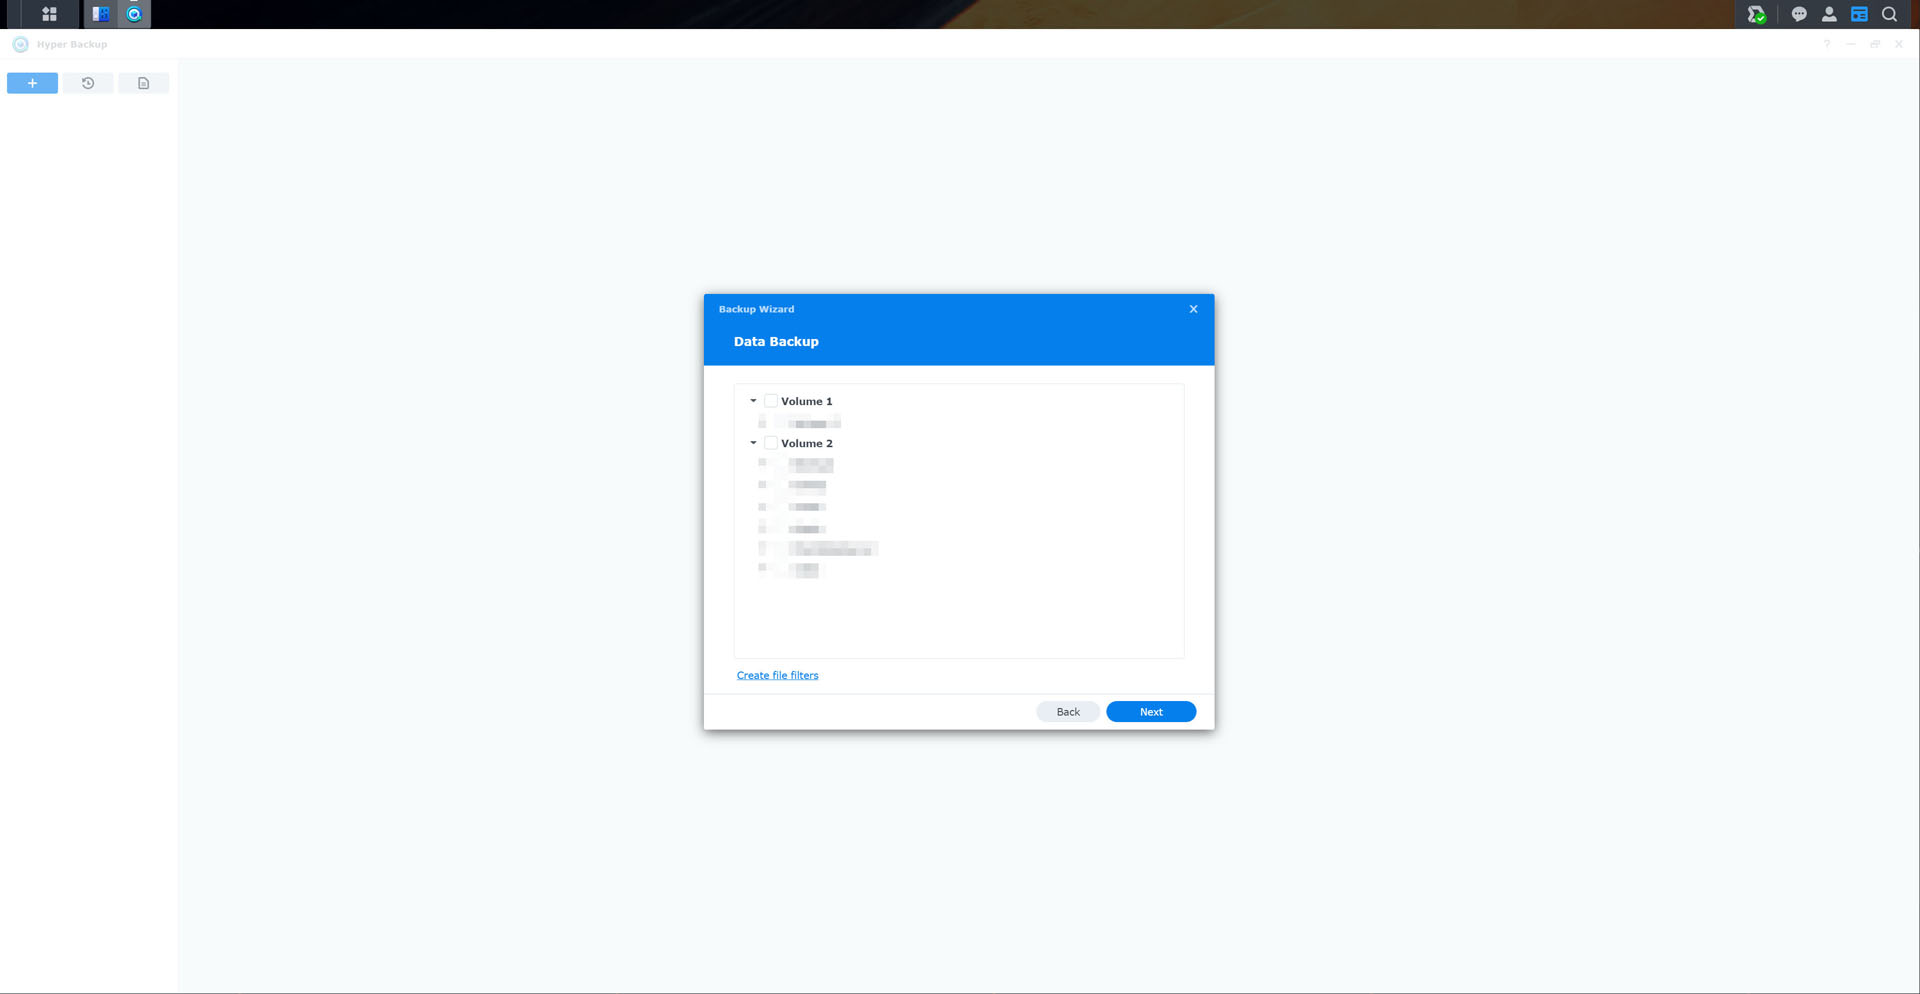

As shown here, we can select what folders to back up and also filter specific types of files to back up. We can even backup specific Synology apps too. After that, we can configure the schedule. While this is up to your personal preference, I recommend performing the backup from like about 2am to 7am when no one is using either NAS (or at least they shouldn’t be working).
You can also select file versioning here. There are a lot of options for you to choose from and again – this is up to your personal preference.
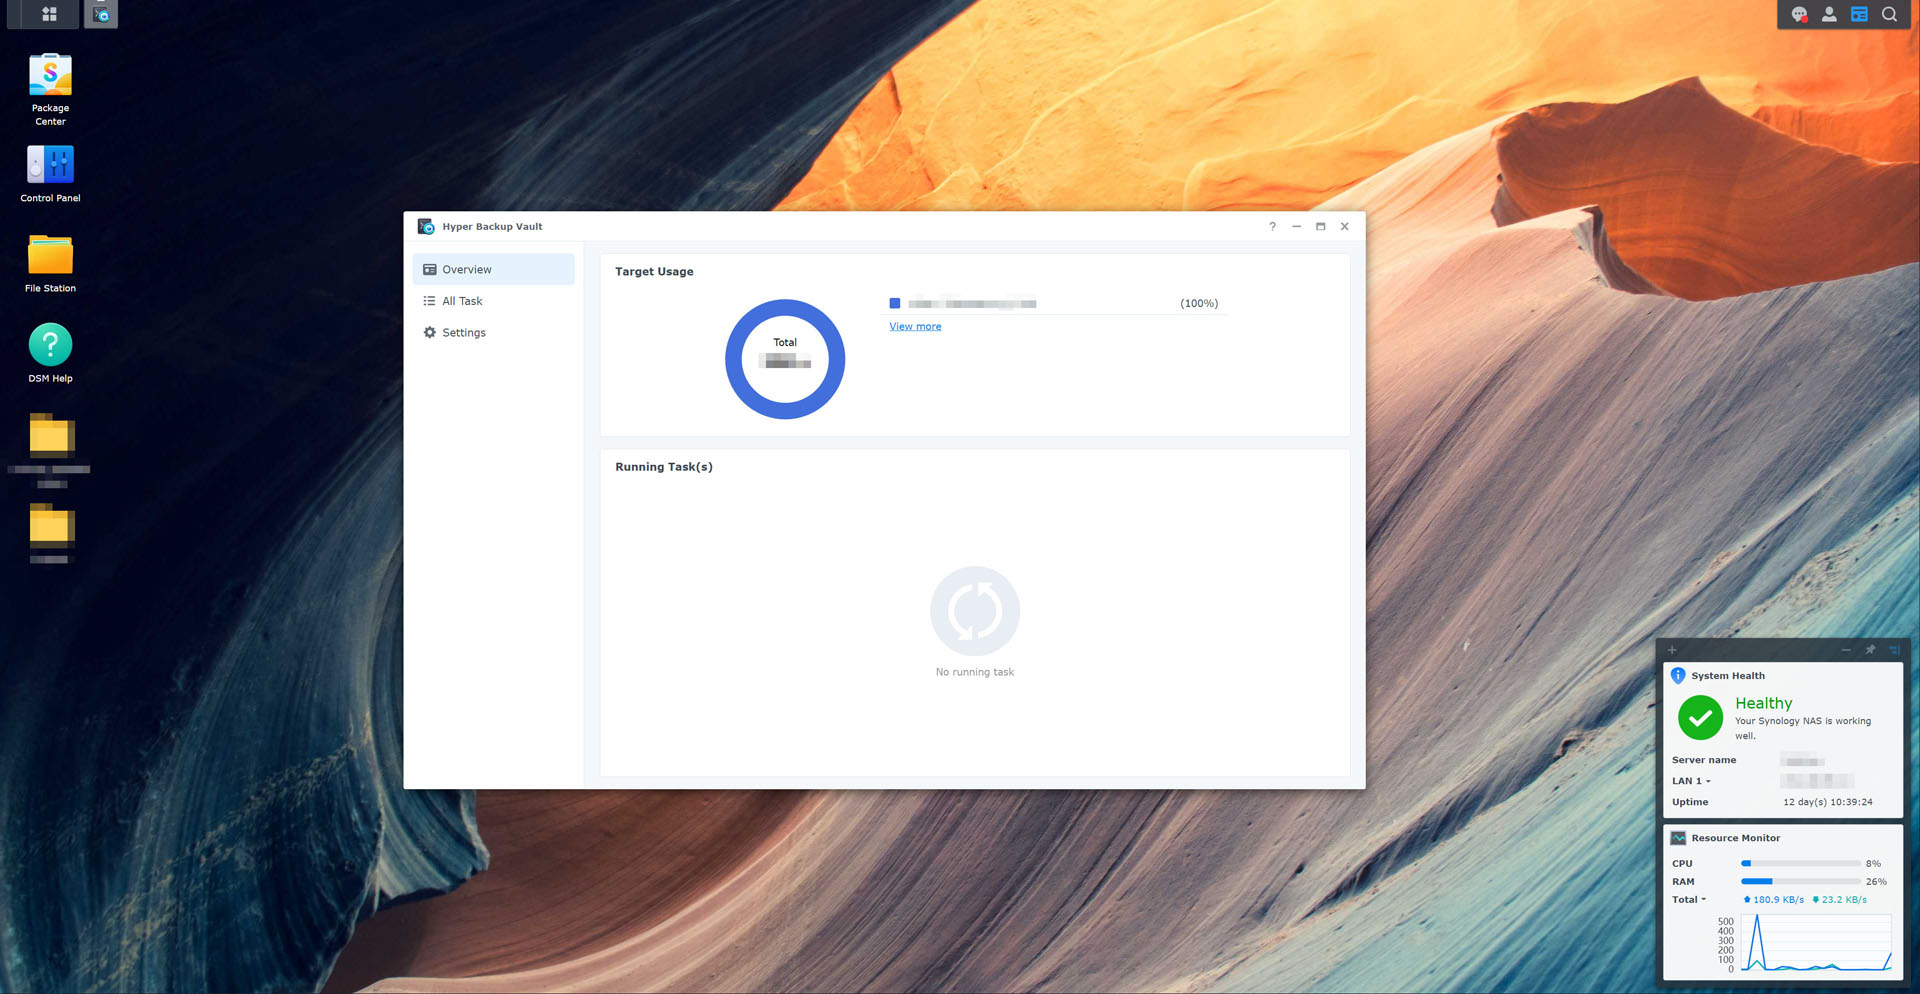
After that – you should be good to go. It does take some time to create the initial backup, though. You can monitor the status using the Synology Hyper Backup Vault on the main NAS, or from the Synology Hyper Backup app from the secondary NAS.
Synology Drive ShareSync to mirror both all files between two NAS
This has to be one of the easiest offsite backup setups I’ve seen. We have to install the Synology Drive Server on both NAS first. Like usual, we can find it in the Synology Package Center.

Again, we’ll need this information from the main NAS:
- Synology QuickConnect ID
- Login ID & password
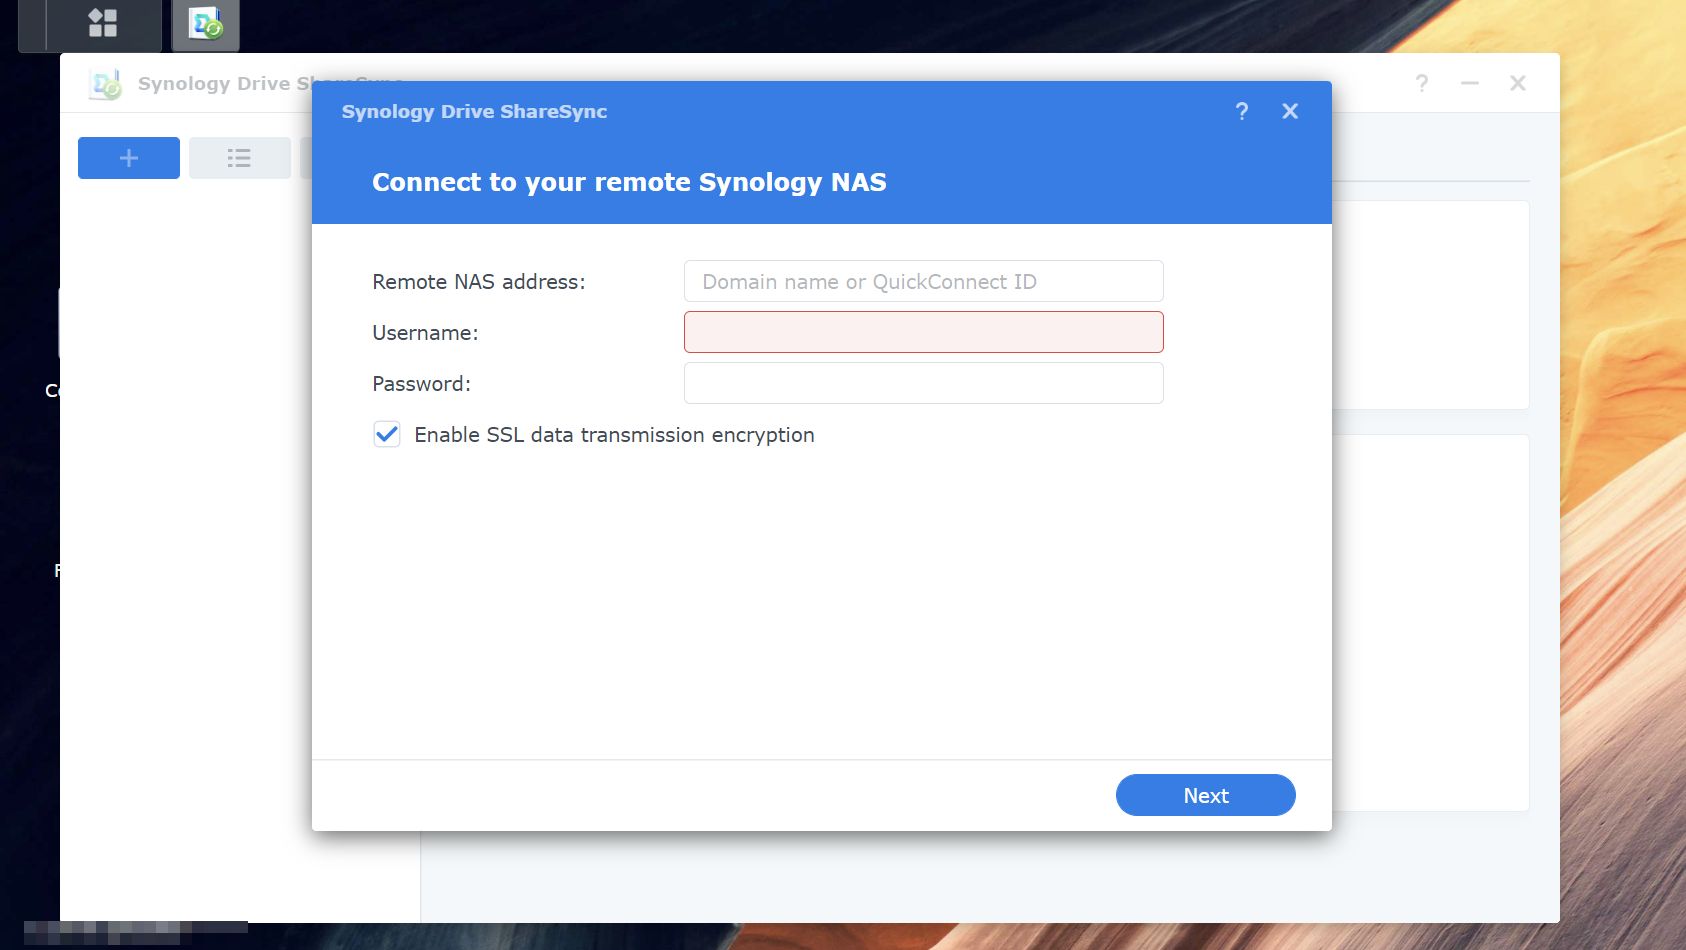


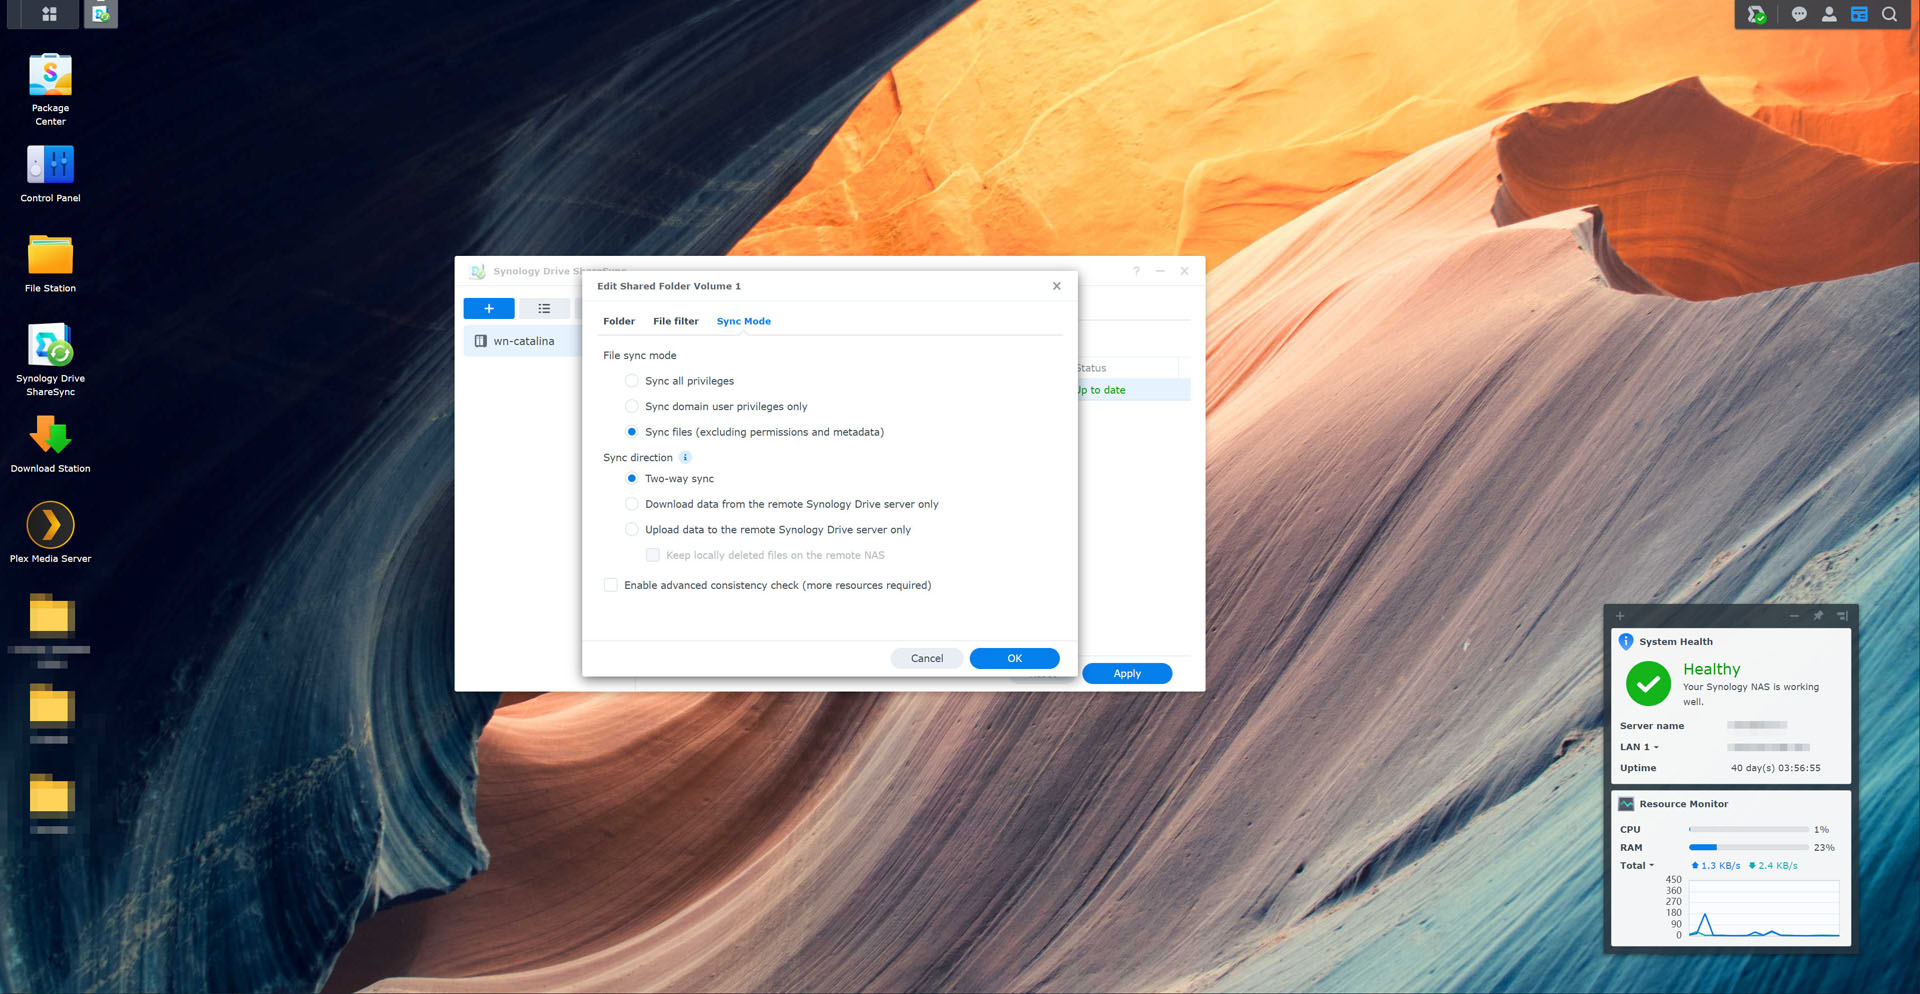
The process is extremely straightforward. Just enter the Synology QuickConnect ID and the administrator login ID and password and you’re done! Select what folder you want to sync with and how to sync, then you’re good.
For me, I want to sync the entire main NAS into the secondary NAS, and keep each other updated by syncing the latest files and versions to each other. There is also versioning so that depends on your personal preference.
You can also speed up the initial sync by literally bringing the secondary NAS to plug it into the same local area network as the main NAS. Syncing through LAN is obviously going to be faster than syncing through the internet.

On the secondary NAS, there will be an icon at the top right corner that we can click to monitor the syncing progress. Or, we can head back into the Synology Drive ShareSync.

Conclusion
And those are the two methods you can use to sync between your two Synology NAS units. They can be within the same local area network or countries apart – and it’ll still work. The Synology QuickConnect feature literally acts as an automatic DDNS for us and simplifies the setup process for us.
Anyway, I’ve been syncing using the Synology Drive ShareSync for nearly 3 months now and I am very happy with it. I am just impressed by how easy it is to set up. It’s quick, and reliable, and there were zero mishaps and the files are always updated between both NAS units. Just login again if it says “SSL error”.