Since the dawn of last year, everyone has been crazy about RGB. It’s no surprise that we all want our rigs to shine brightly. We’re not judging on your lighting taste – everyone has their own preference. Instead, in this RGB guide, we’re here today to show you how to RGB your rig regardless of motherboard you have, so let’s take a look at how the lights function.
There are people asking us how to RGB-fy their systems that are already a few years old and doesn’t have RGB header on the motherboard? The answer is simple – there are adapters out there that help you achieve pure RGB goodness. This is a how to RGB guide for those who are seeking to pimp our system with disco lights.
We have a 2-part video here. First, we experiment how the RGB lights can be connected between one another, whereas the second video will be on the end result and how the system looks.
Part 1 – Experimenting with the RGB system
It’s no surprise that RGB lighting system is lacking of a standardised system. That’s not an issue since there are different RGB ecosystems out there – some are compatible with each other, but some are not. The most widely known and adopted RGB system is the 4-pin RGB header system. There are 3 pins for all 3 colors, and another one more pin for the voltage.
Some older systems that still work fine don’t even have support for RGB! Fret not – as there are other ways to make your system shine without the need of a new system entirely.
We feature Cooler Master’s RGB products here since we have them lying around in the office. Here’s a list of the items used in this how to RGB guide with links to buy them on Lazada:
- 1-to-3 RGB splitter
- MasterLiquid ML240L
- RGB LED light bar
- RGB LED Controller
- MasterFan Pro 120 RGB (Also available in packs of 3 together with splitter and controller)
They’re very versatile as we are able to daisy chain quite a few things together. The Cooler Master RGB light bar is super sturdy and magnetic, hence it won’t warp like any other any typical 5050 RGB LED strips. It also has connectors at both ends – and either one can be the input and the other one will automatically become the output. Then, you can chain the RGB light bars with RGB fans, too.
If you only have one RGB header available, then you can daisy chain the 1-to-3 RGB splitter as well. Really diverse ecosystem here.
One thing you have to be careful here is the polarity. If it doesn’t light up or lit up in the wrong color, then check your connections. I highly recommend you to watch the video above to really get the idea on how to RGB your own system. We experimented with quite a few different connection methods, but the possibilities don’t just end there.
Whichever the case may be, careful planning of cables is important as RGB systems bring in an extra set of cables just for the RGB lighting itself.
Part 2 – Building the system
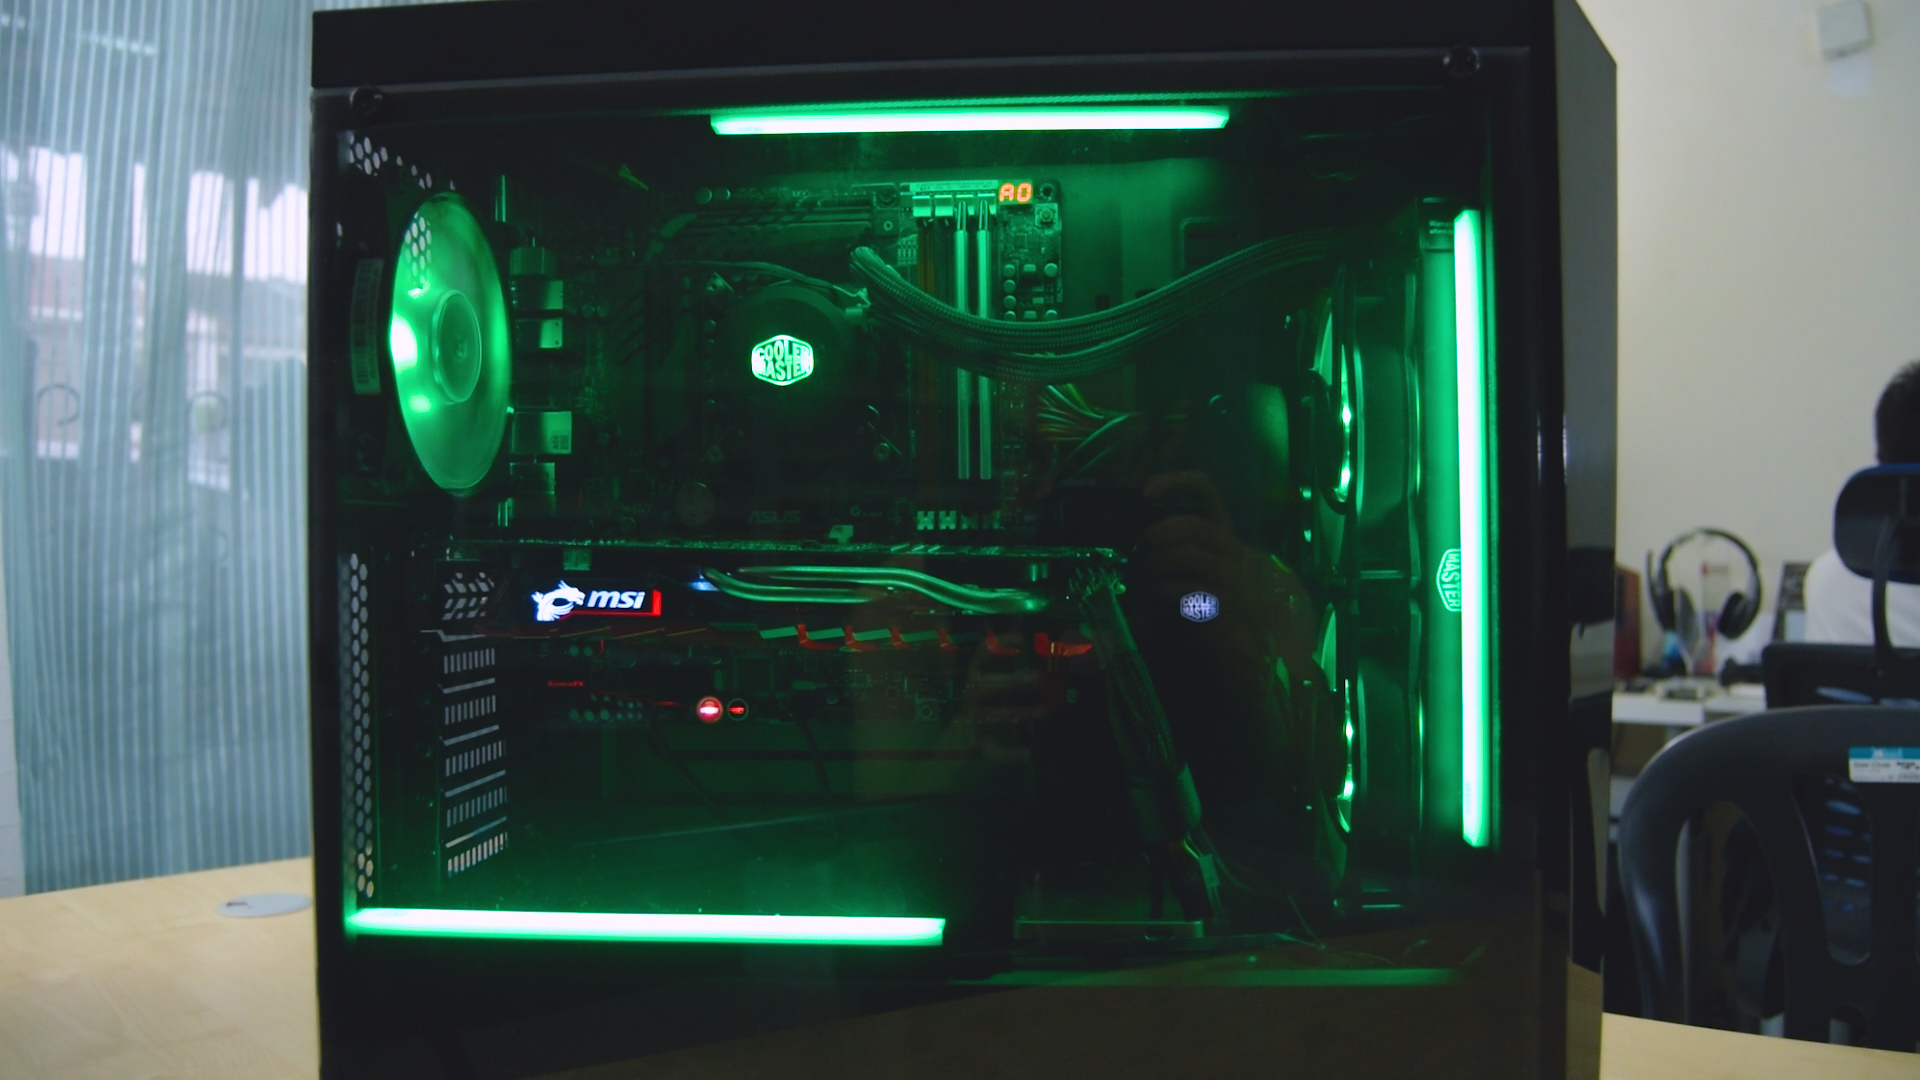
As for the second part here, we swap out the original MasterLiquid ML120L for a beefier MasterLiquid ML240L with push-pull configuration. A total of 4 RGB fans are used here for maximum bling. By doing that, we’ll have to mount the radiator at the front. Luckily enough, it can support push-pull configuration without any issue. Good job Cooler Master for making a budget case like the MasterBox 5 Lite to support these features.
Since we’ve already have a plan since Part 1 of the video, we know what goes where and how to route the cables. We mounted two of the RGB light bars at the top (since we like ceiling lights), one beside the radiator at the front, and another one on top of the PSU shroud. As we already know that these light bars can be chained from one to another, managing these cables are easy.
However, the same cannot be said for what happened behind the motherboard tray. An extra set of RGB cables will need to be managed alongside with the usual power cables, hence it’s a bit of a challenge. Luckily, we have the power supply shroud to hide all of the unused cables and also extra lengths.
The end result? Gorgeous.


Comments are closed.